ENLIGHTENMENT
Colecionaveis: World One-Handed Weapon Collection Vol. 3, Faded Abyss Artifact
Cadeia de missoes: The Claustro do Esclarecimento → O Sábio do Deserto → Novas perspectivas → Sede de poder
Recompensas: Du Master's Crown, Faded Abyss Artifact
THE CLOISTER OF ENLIGHTENMENT
※ The chapter boss is very difficult. Prepare 50+ food items in advance, from basic grilled meat to high-healing foods.
Move to the quest waypoint. There's a cave with a drop.
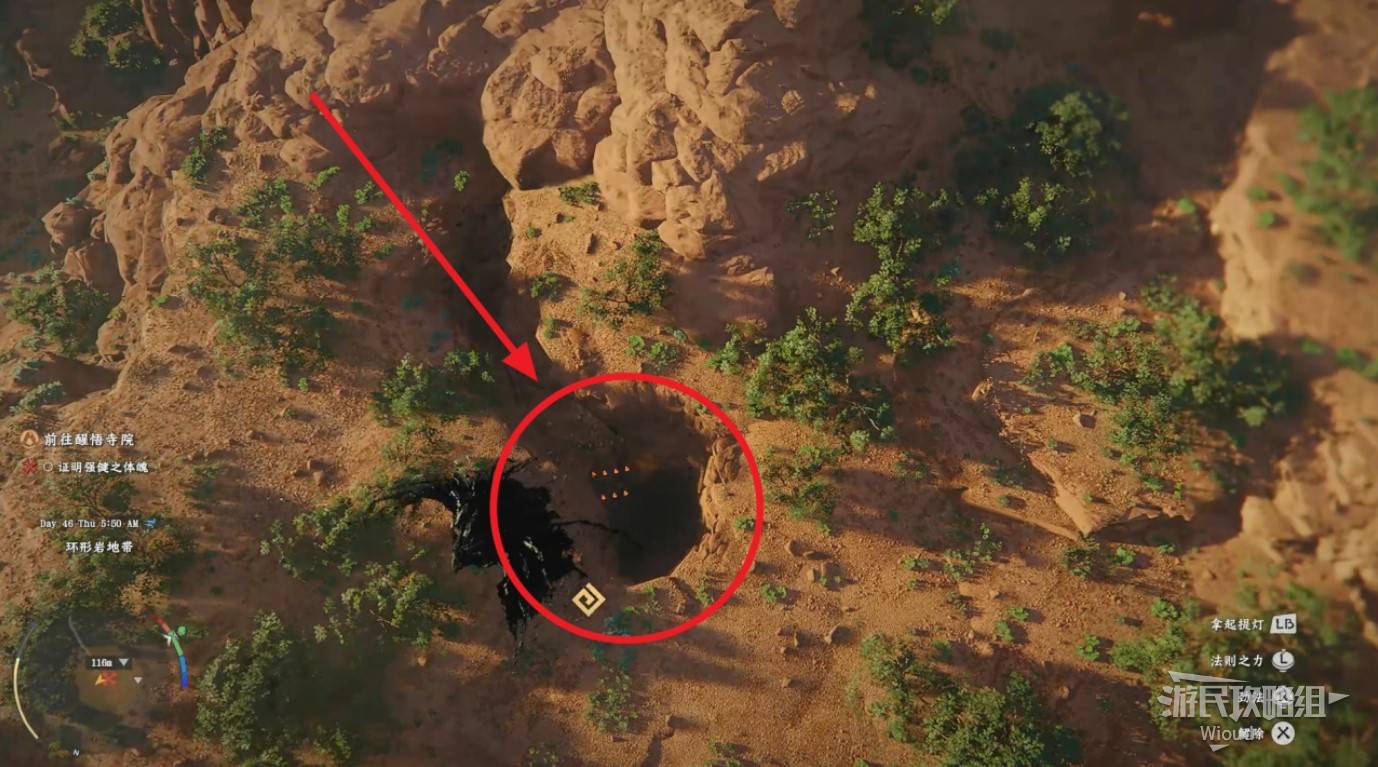
Imagem: GamerSky.com
Jump down. At the end you'll see a circular stone door. Ignore it first — go left. In the room at the end, pick up the book "World One-Handed Weapon Collection Vol. 3" from the right-side table.
On the stone platform, pick up a "Faded Abyss Artifact." Check your three base attributes — Health, Stamina, and Courage — and ensure each is at least level 5, or you can't continue the main quest. Use the Faded Abyss Artifact to respec if needed.

Imagem: GamerSky.com
Return to the stone door. Stand in the center and push. This consumes your base attributes to open the door. If your points are sufficient, it opens normally. The room inside immediately triggers the boss fight with Du Master.
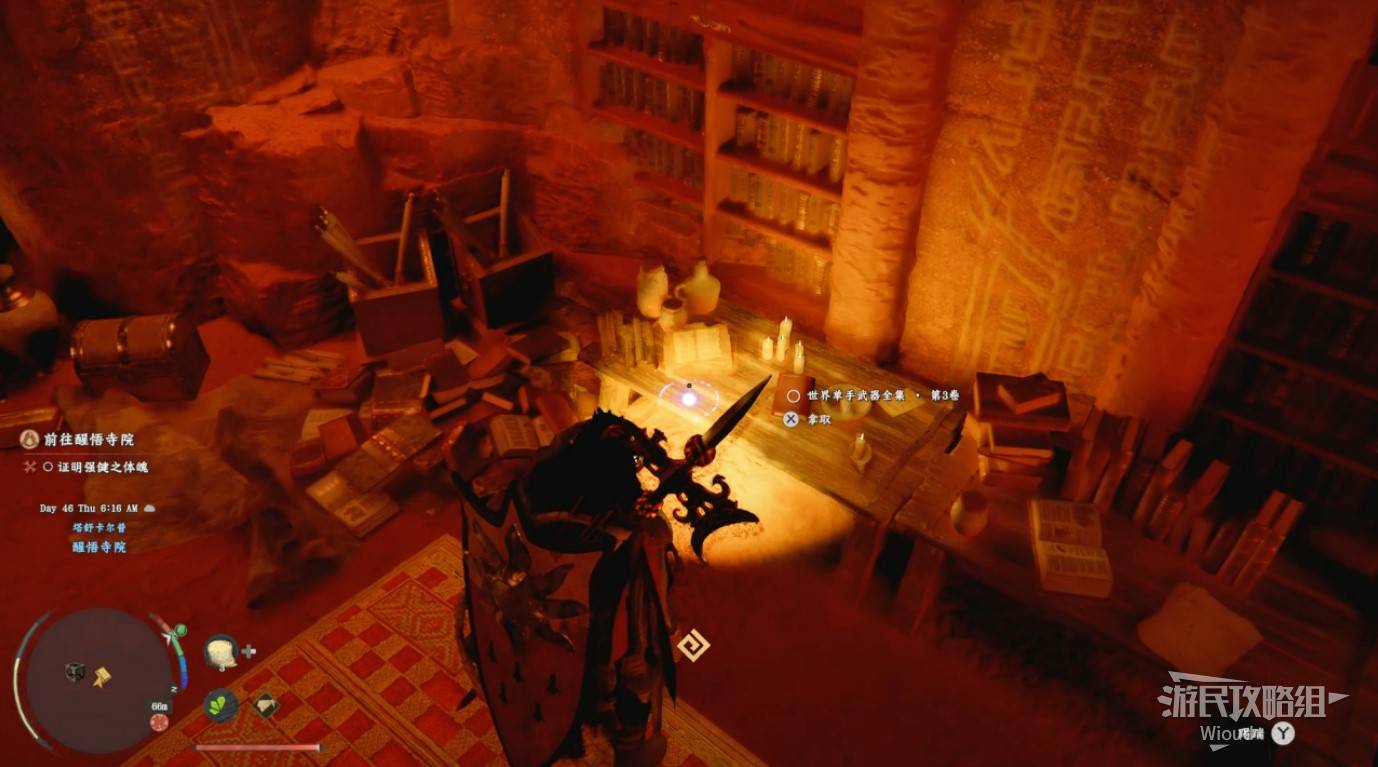
Imagem: GamerSky.com
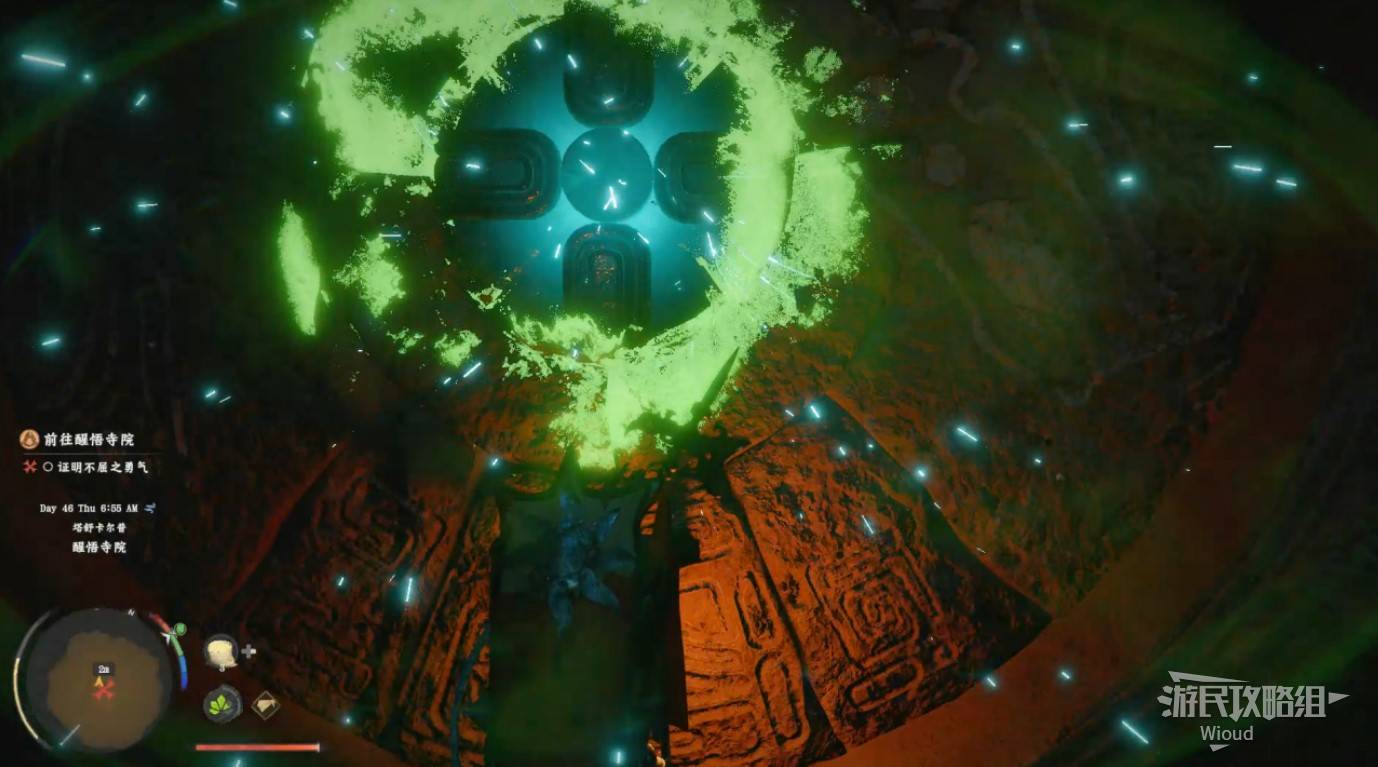
Imagem: GamerSky.com
LUTA CONTRA O CHEFE: DU MASTER (THE SAGE OF THE DESERT)
Du Master has two health bars and fights with a sword. Have revival pills ready for phase two — his laser attacks can instantly kill you.
During normal melee attacks, try parrying. A successful parry staggers him briefly — follow up with four heavy attacks then light attack chains. During your heavy attacks, he can barely move, so attack freely.
Phase one killer move: He rapidly leaps between stone pillars in the arena, then lunges straight at you. This deals massive damage. When he finishes the pillar jumps, there's a brief telegraph — you must dodge sideways repeatedly. Always heal to full when he starts pillar-jumping, as surviving a hit depends on max HP. Blocking does nothing against this move.
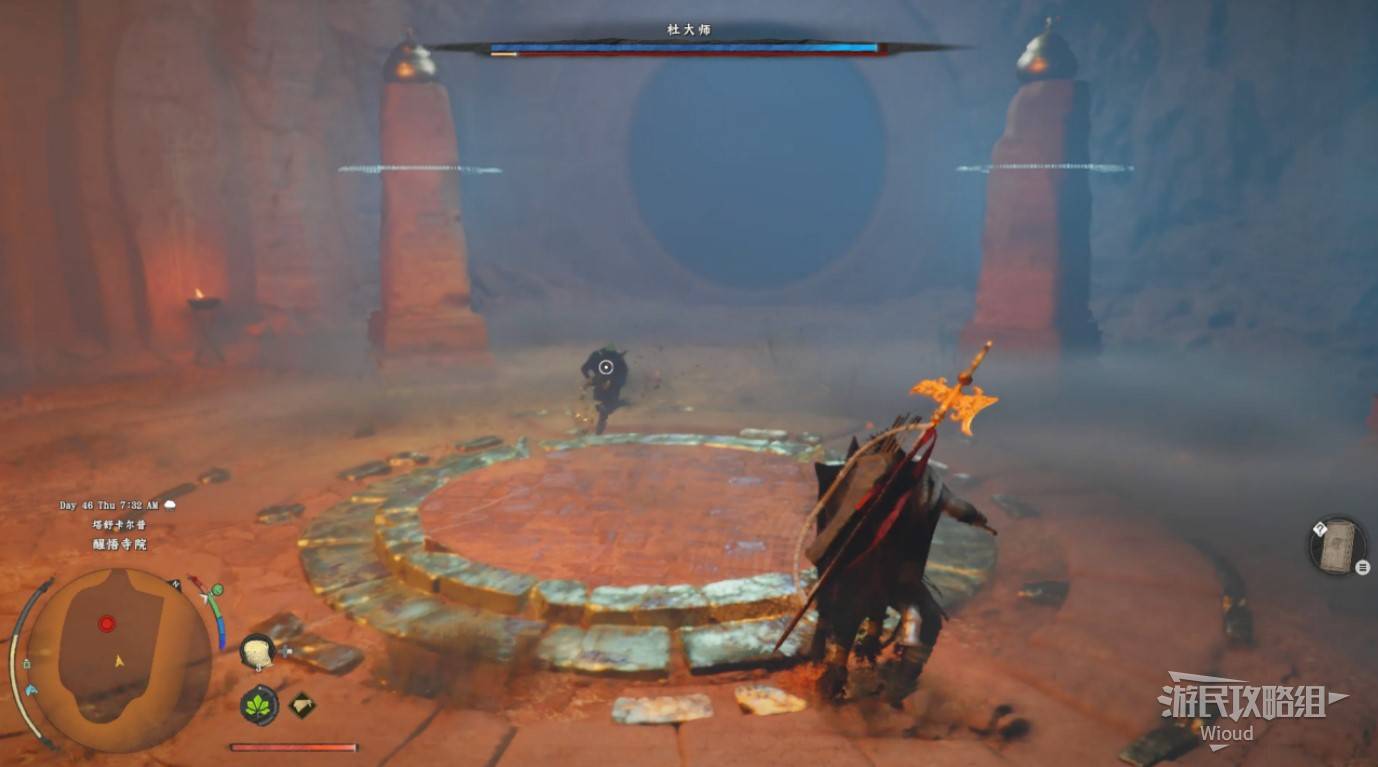
Imagem: GamerSky.com
In phase two, he fires green lasers with extremely high damage. If your Health skill is below level 8, you'll be one-shot.
When he fires three consecutive lasers, you must perfect-dodge all three or die. Getting hit by one knocks you down, leaving you helpless for the second. With maxed Health (level 10+) and armor refinement level 8+, you might survive a single laser at full HP.
Revival pills become your lifeline in this phase. He occasionally fires a weaker single laser between normal attacks, dealing less damage than the triple burst. Lasers pierce through pillars — hiding behind them is useless, and blocking doesn't work either. For other attacks, continue using the parry-and-punish strategy from phase one.
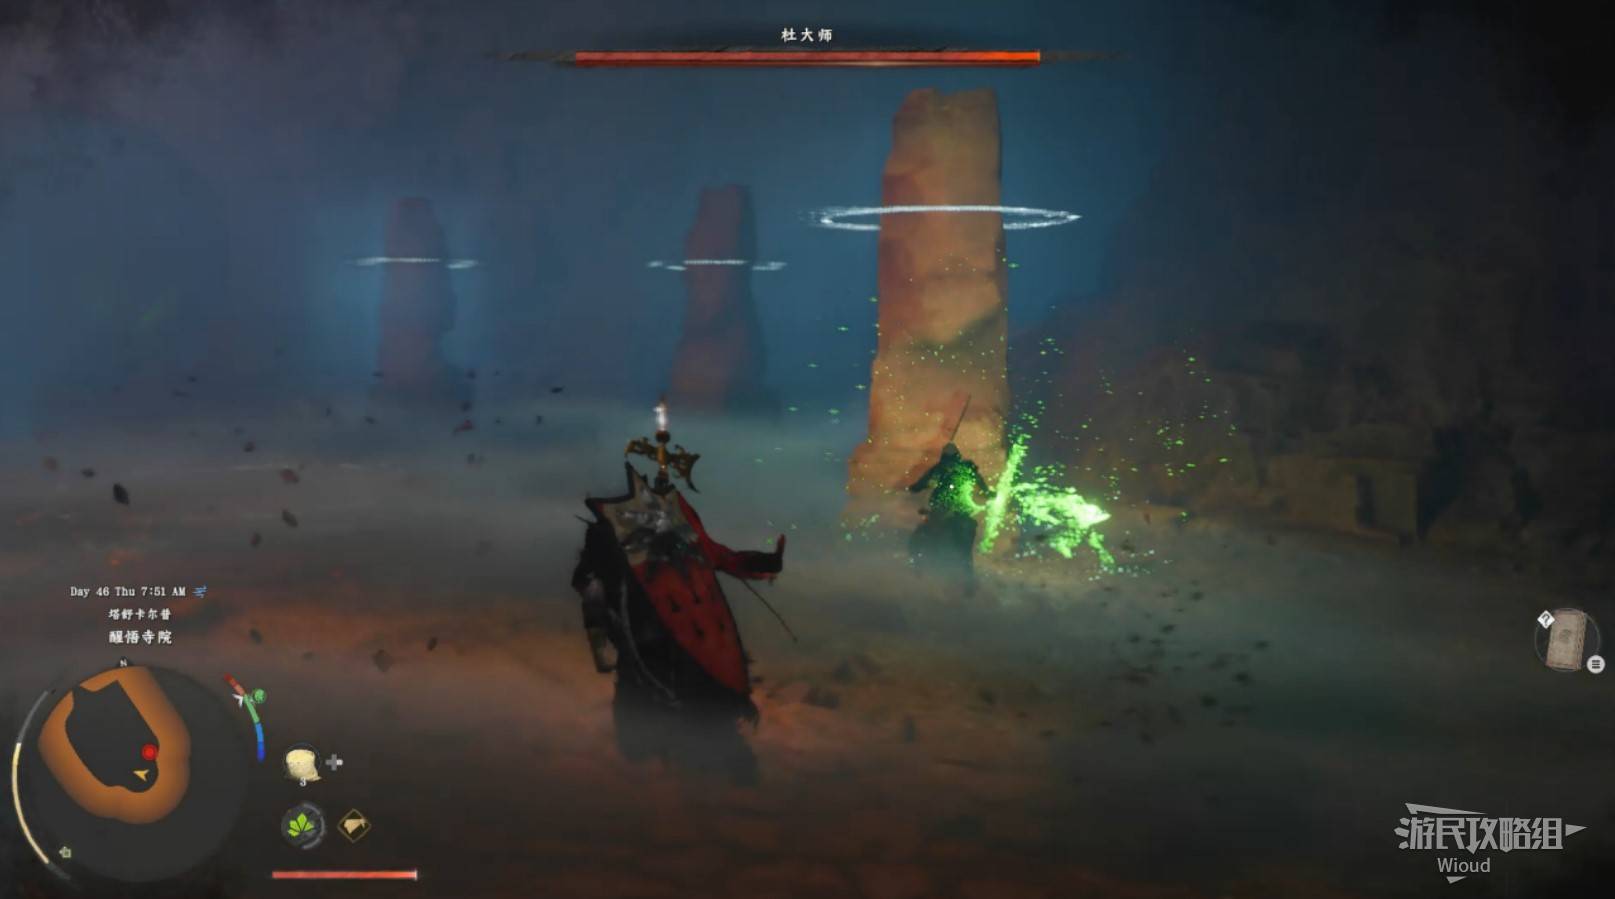
Imagem: GamerSky.com
NEW PERSPECTIVES
Teleport to the "Valiant Nest" on the Abyss map. The quest sends you back through the Sun Spire again.
Head left down the staircase, jump across platforms through the triangle door, and teleport at the end.
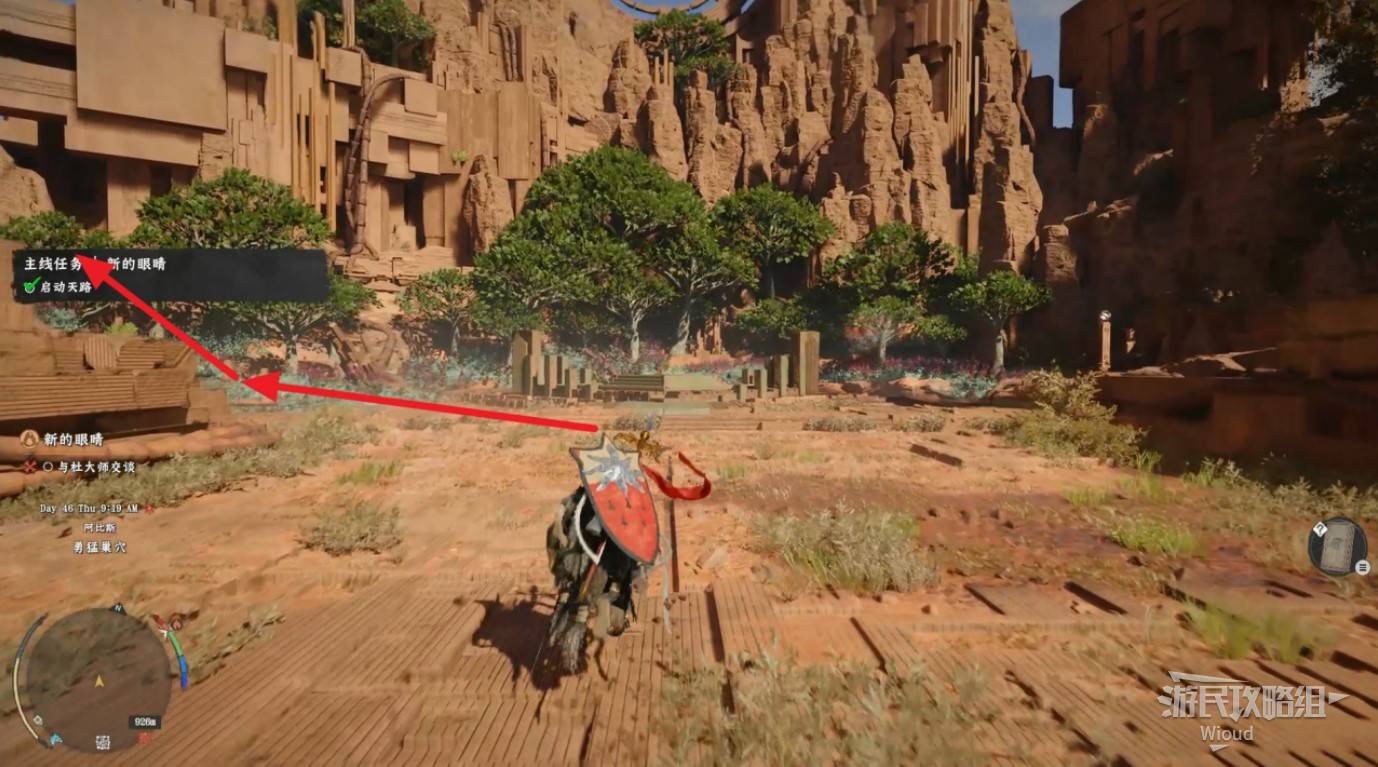
Imagem: GamerSky.com
Continue along the path. Grab onto moving rectangular platforms — climb over from the side or top. Follow the path to the large platform at the end.
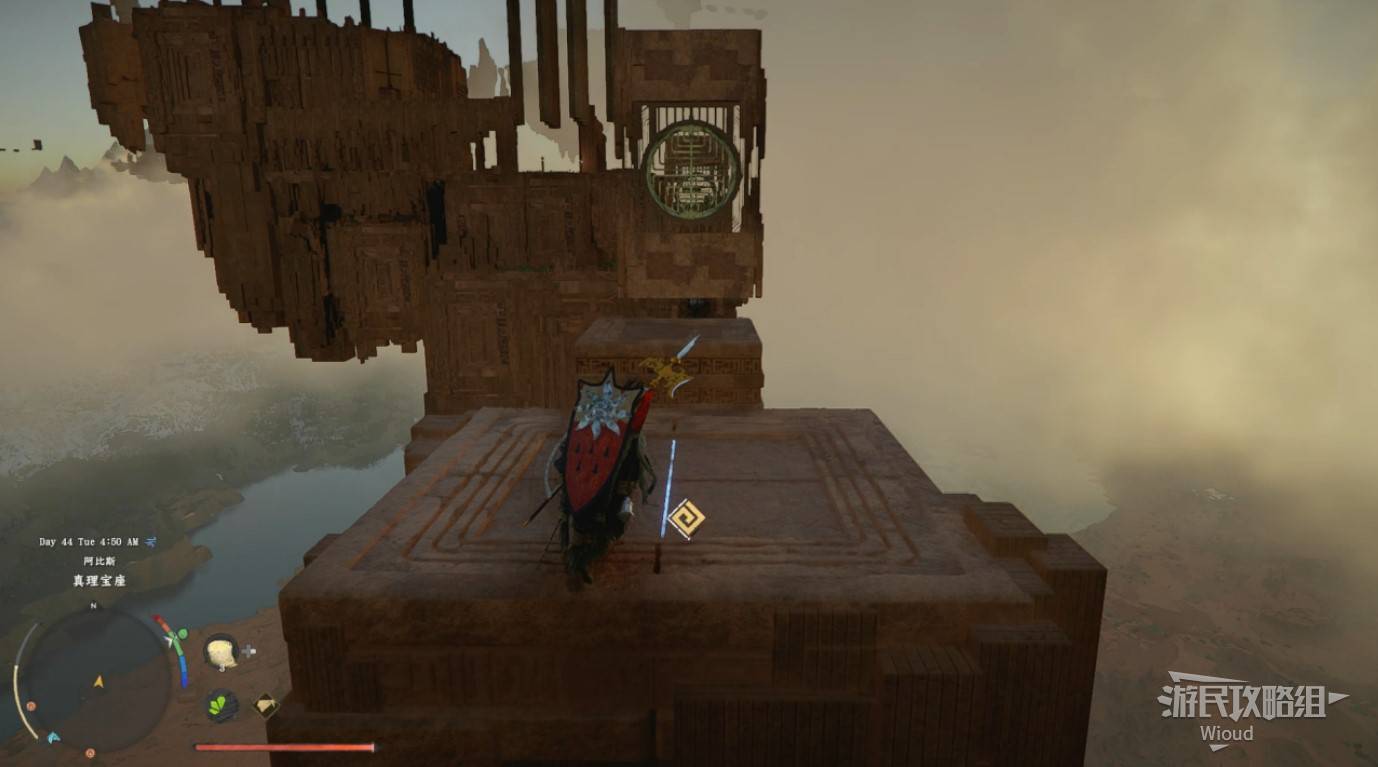
Imagem: GamerSky.com
Jump down through the opening.

Imagem: GamerSky.com
Below, interact with the broken wire to reconnect it.
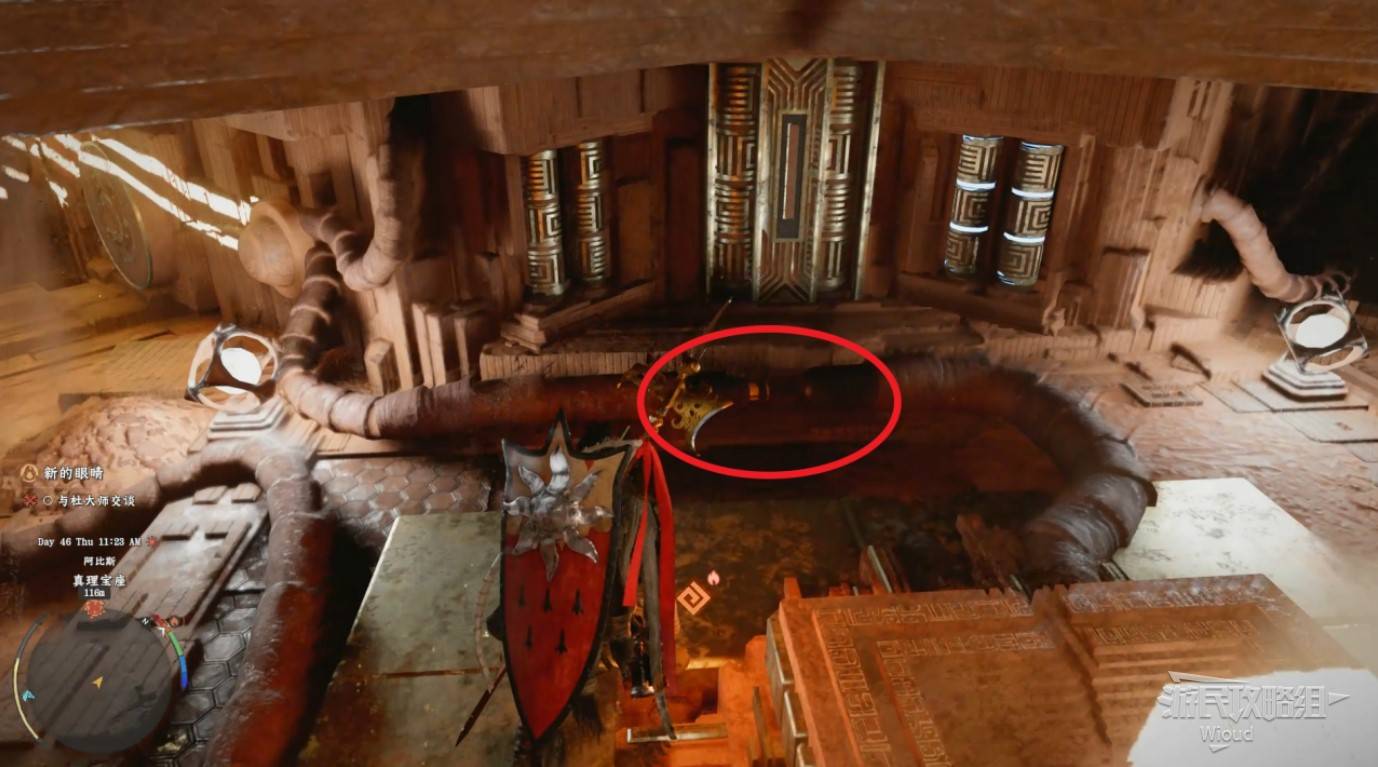
Imagem: GamerSky.com
Open the skill panel and learn "Gale Impact."
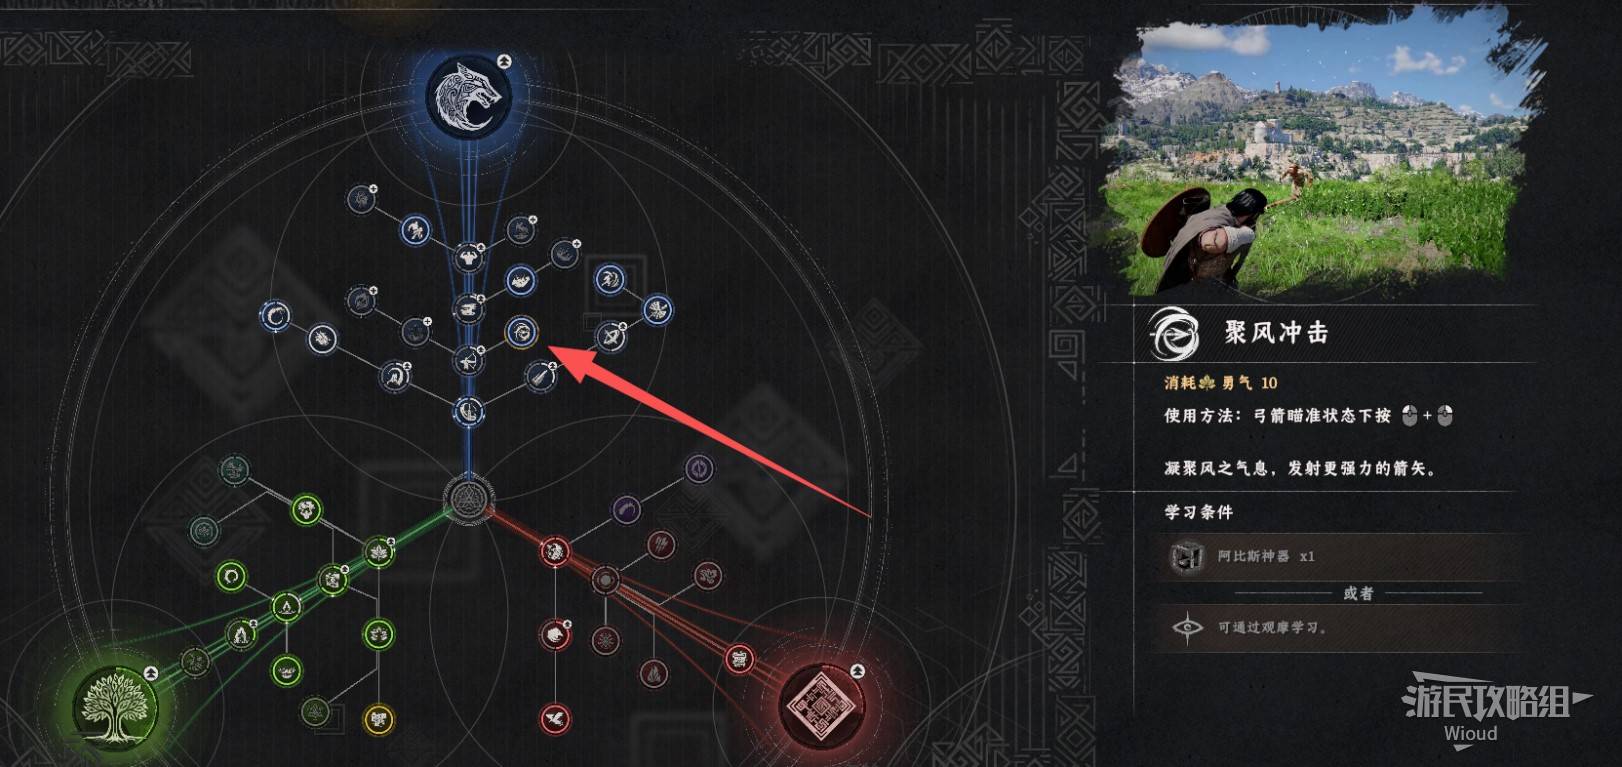
Imagem: GamerSky.com
Use charged "Gale Impact" shots to hit the discs in numerical order. After hitting the second disc, jump to the platform below disc 1, then shoot the disc on the right side.
Note: This puzzle has several different sequence templates with different disc arrangements. Save before attempting — repeat using the sequence shown until you get the matching template.
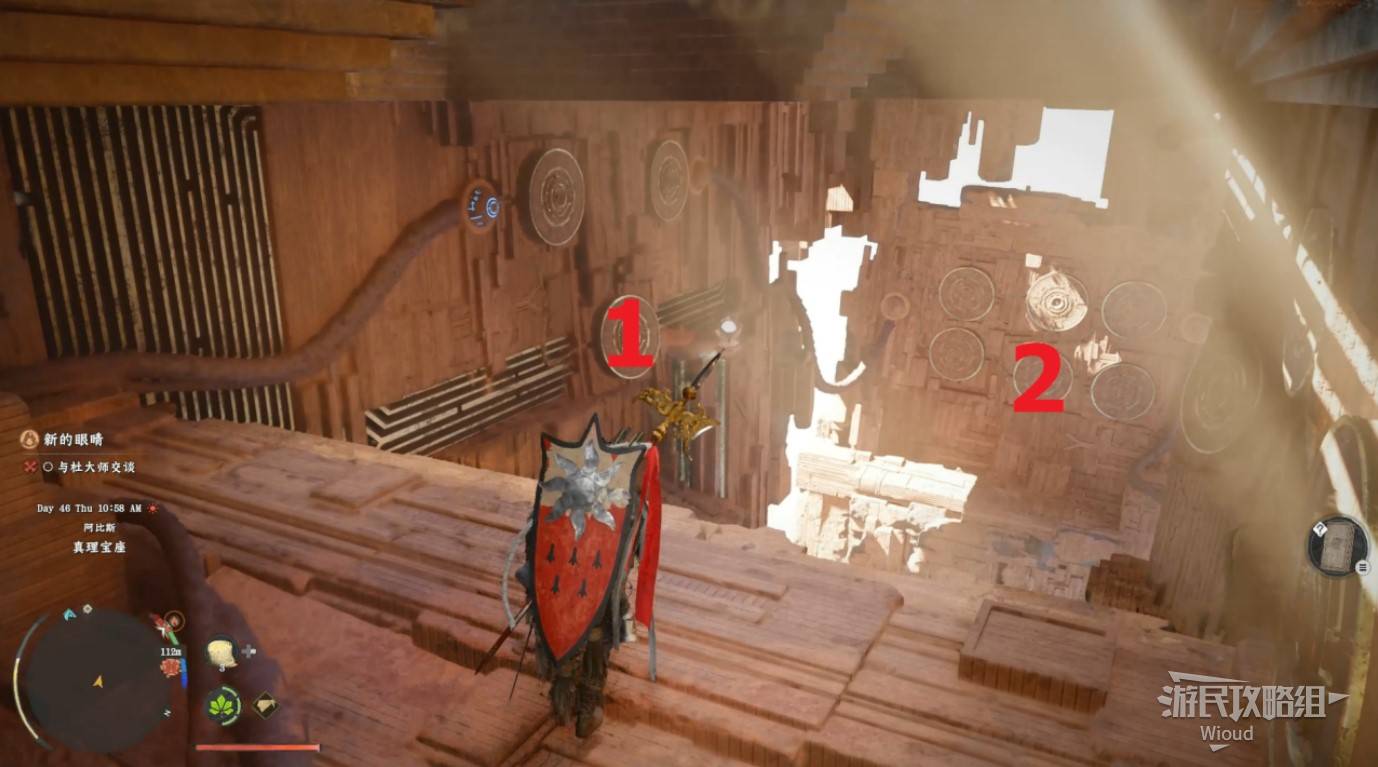
Imagem: GamerSky.com
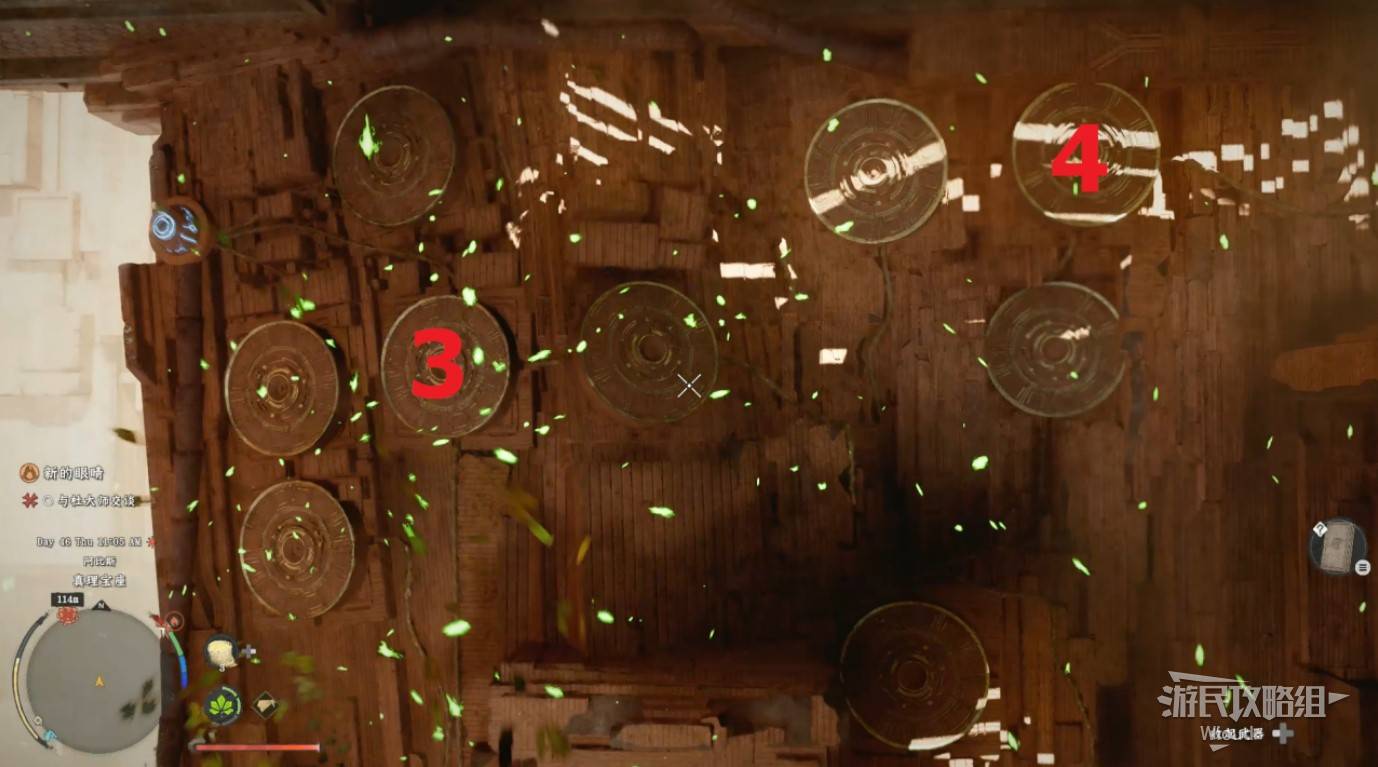
Imagem: GamerSky.com
Climb up, ride the air current to the upper platform. A cutscene grants the special equipment "Du Master's Crown."
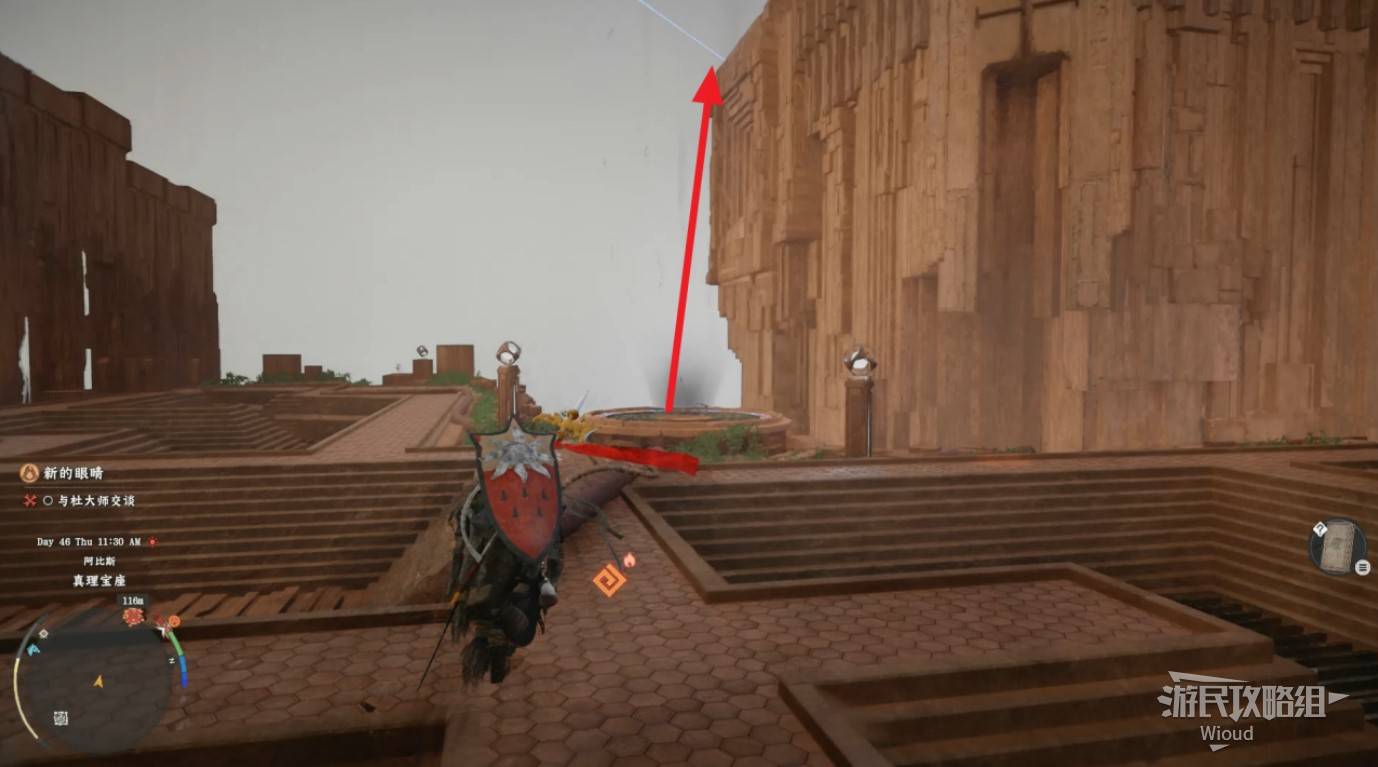
Imagem: GamerSky.com
After the cutscene, pass through the triangle door ahead. Activate the pillar and walk along platforms to the end. Wait for a moving rectangular platform — grab on and float upward.
When jumping to the second platform, note the small space opposite with a chest containing a Faded Abyss Artifact and weapon inscription.

Imagem: GamerSky.com
Move to the top of the opposite platform and teleport to the "Dimensional Labyrinth."
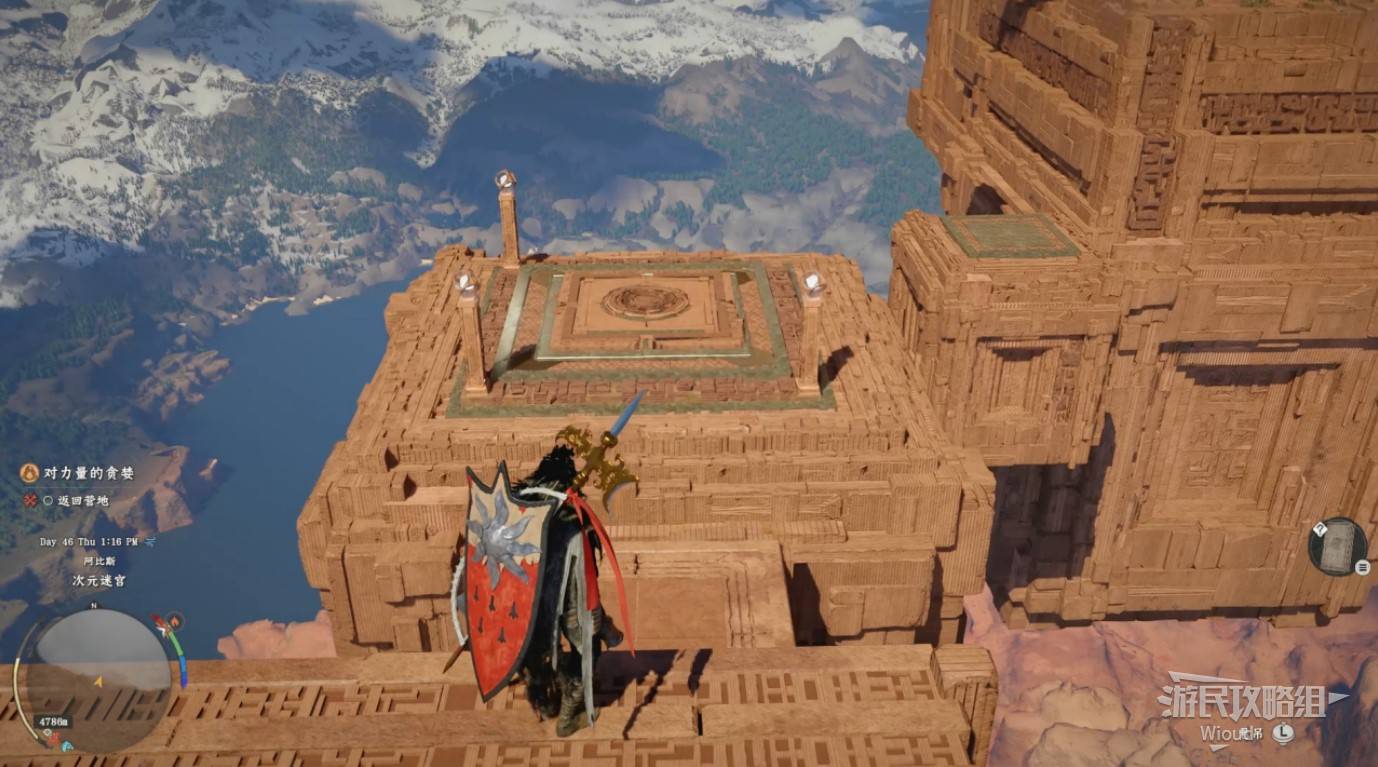
Imagem: GamerSky.com
Wait for the rectangular platform on the right to approach. Grab on and ride to the first platform on the right. Activate the teleport point and leave to continue the next main quest.
LUST FOR POWER
Teleport to Wolf Hill. Watch the cutscene to complete this chapter.
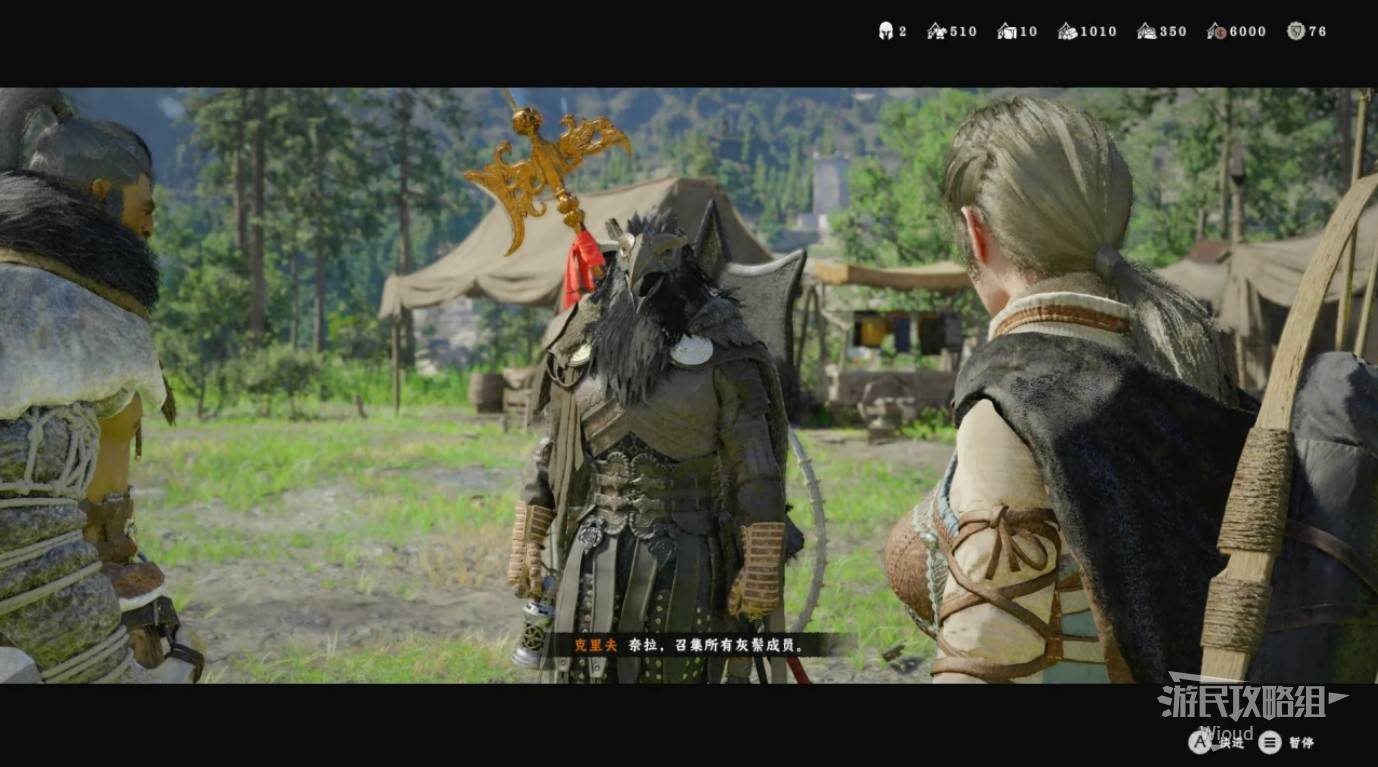
Imagem: GamerSky.com
Proximo: Chapter 10 — Counterattack