⚠️ Before you begin: This quest is locked until you complete the faction quest [The Wise Witch](/guides/wise-witch-faction-quest). Head there first, then return here to continue the Chapter 5 story.
Black and White Walkthrough
Books: 1 | Skills: 1 | Abyss Artifact: 1
Quest Chain: The Crow Summoner → The Crow's Warning → Bloodbath → Secrets Hidden in the Church → Into the Lair
THE CROW SUMMONER
Head to the Hernand Castle marker. A soldier reports an intruder. Enter the castle, take the right staircase to the second floor, then continue up one more flight. Enter the left archway to reach the area above the Law Library entrance.
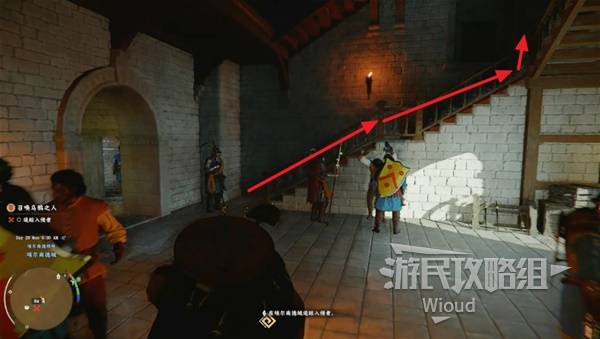
Image credit: GamerSky.com
At the end of the corridor, there's a locked room. You need a key from the Black Market merchant to open it.
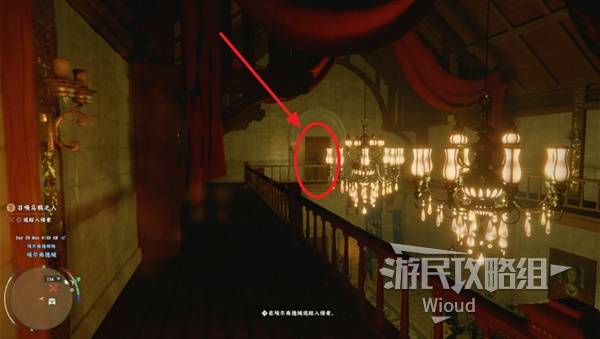
Image credit: GamerSky.com
Inside, grab "World Cloth Armor Collection Vol. 3" from the bookshelf on the left.
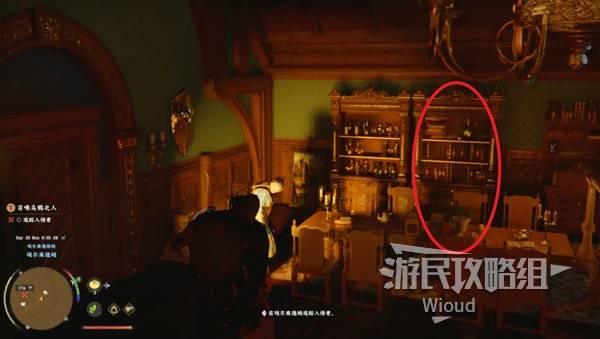
Image credit: GamerSky.com
THE CROW'S WARNING
Enter the Law Library. Walk to the building entrance to trigger a fight. Inside, you find the man in red has been stabbed. After the cutscene, jump down from the library back to Hernand.
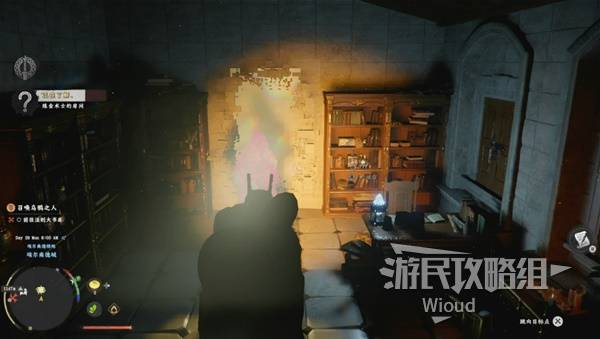
Image credit: GamerSky.com
BLOODBATH
Follow the markers to the southeast corner of Hernand to find the Crow Summoner. Watch the cutscene, then defeat the enemies that appear.
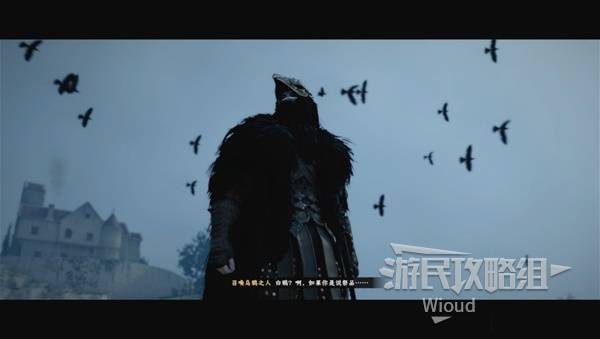
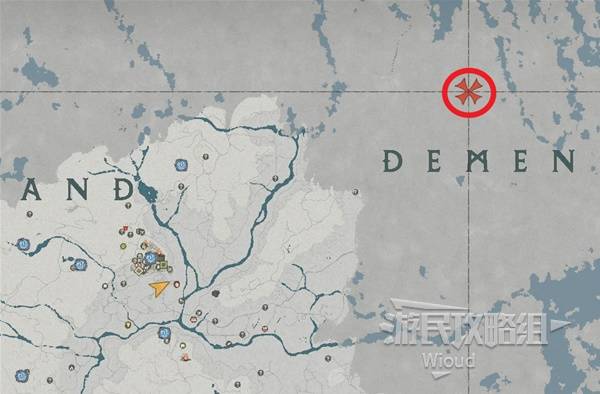
Image credit: GamerSky.com
Travel to the next (distant) marker. Approach the bodies on the ground for a cutscene, clear the enemies, then fight the Crow Summoner for the first time.
The Summoner has long gaps between attacks but uses multi-hit combos. Tap the block button during combos to parry, then counter-attack. A straightforward fight.
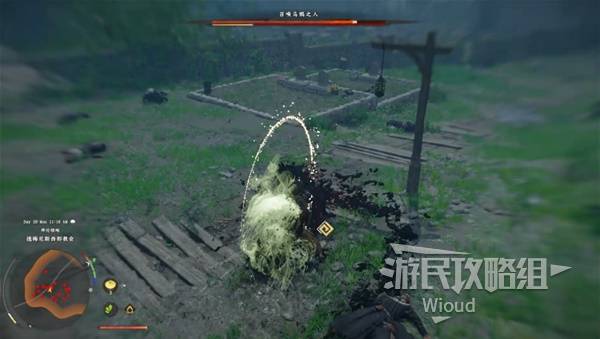
Image credit: GamerSky.com
When the enemy goes airborne, watch carefully — you can learn the skill "Crow Rush" by observing.
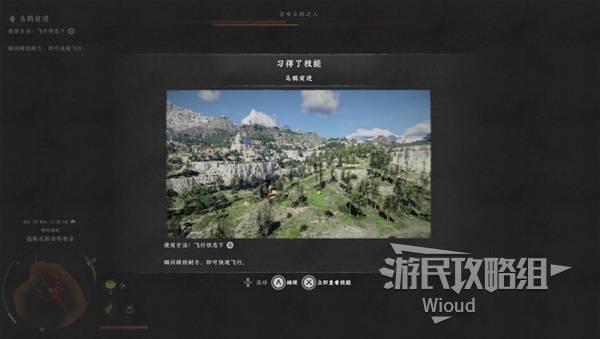
Image credit: GamerSky.com
SECRETS HIDDEN IN THE CHURCH
The Summoner escapes to a nearby stone tower. Ignore the tower for now — head right through the archway:
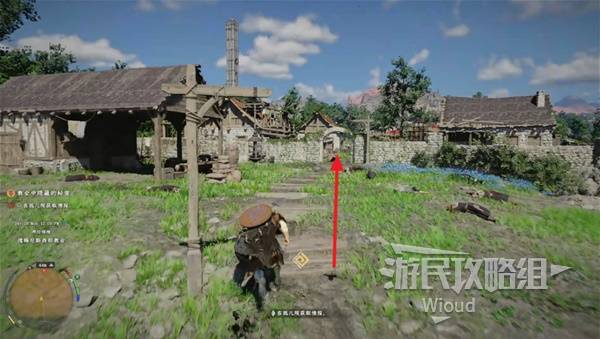
Image credit: GamerSky.com
Find a building with blue flower beds on the left. Enter to trigger a cutscene and receive the "Church Underground Warehouse Key."
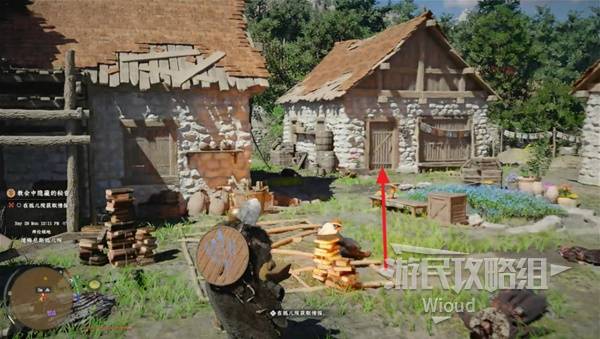
Image credit: GamerSky.com
Go to the next glowing marker and use the key to open the small building:
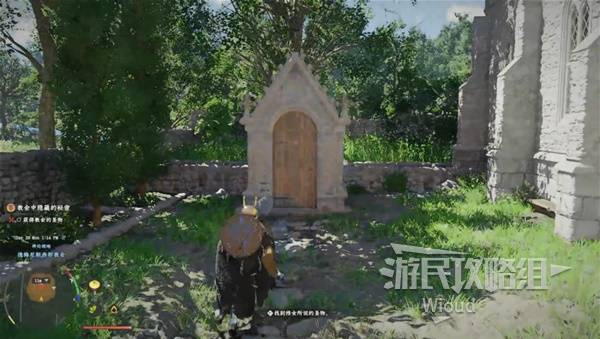
Image credit: GamerSky.com
Descend the stairs to find a safe box. Solve the puzzle by pressing the stone blocks in the order shown below. You'll receive the "Shining Dagger."
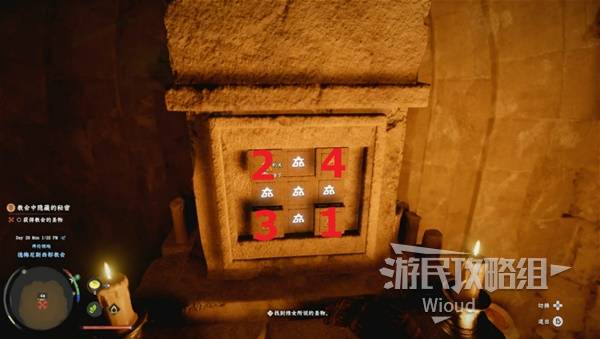
Image credit: GamerSky.com
Return to the stone tower where the boss disappeared. Insert the dagger into the central slot:
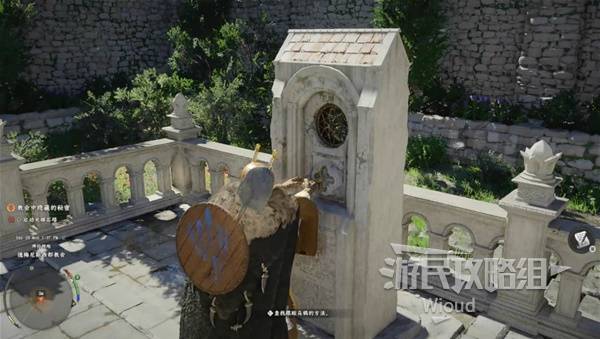
Image credit: GamerSky.com
When the tower ascends, rotate the stone disc to correct the pattern. Match it as shown below — start with the outer ring, align with the protruding sides, then work inward:
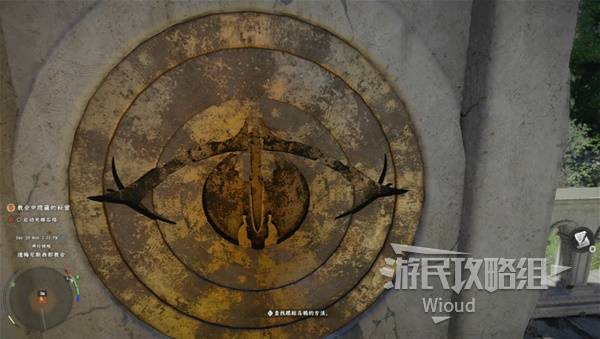
Image credit: GamerSky.com
INTO THE LAIR — ASCENSION TOWER
Head to the Ascension Tower marker. The front entrance is blocked — go around to the right rear to find a cave entrance below:
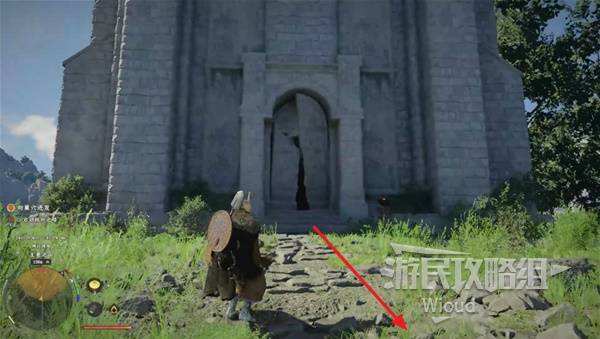
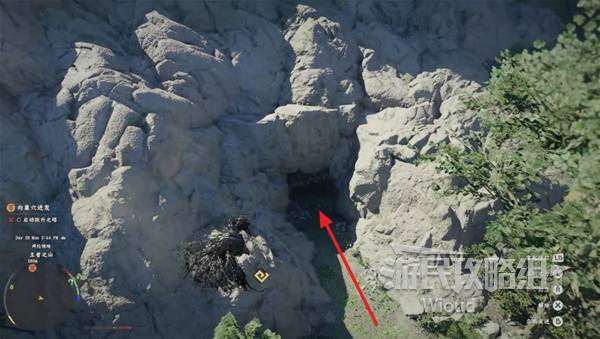
Image credit: GamerSky.com
WIND TUNNEL: Inside the tower base is an upward wind column. Jump and switch to glide mode — the wind carries you up automatically.
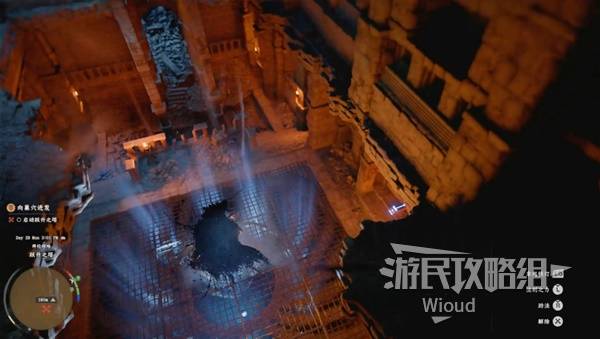
Image credit: GamerSky.com
ENERGY FLOW PUZZLE 1: When blocked by a platform, land on its side. Look for a circular disc mechanism on the wall. Rotate the disc to create a connected path (follow the red route shown):

Image credit: GamerSky.com
ENERGY FLOW PUZZLE 2: Drag the wall disc left to connect energy from left to right. Simple rotation puzzle:
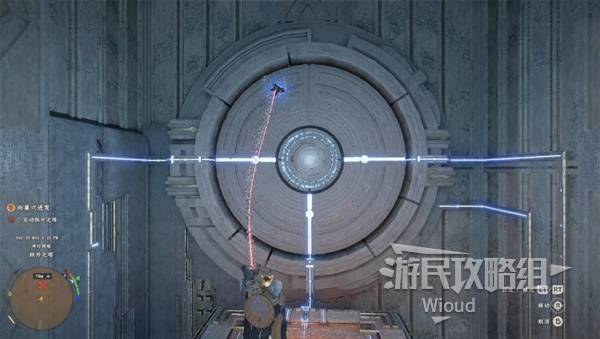
Image credit: GamerSky.com
Ride the platform to the top, then wait for an elevator to transport you to a new area. Activate the nearby Abyss marker first.
ABYSS AREA PUZZLE: Open your map and complete these tasks:
- Red markers (×2): Use Axiom Force to aim the mechanism's beam at the front disc
- Blue markers (×2): Repair the broken pipes
WARNING: Avoid the purple flowers on the ground — they deal continuous damage.
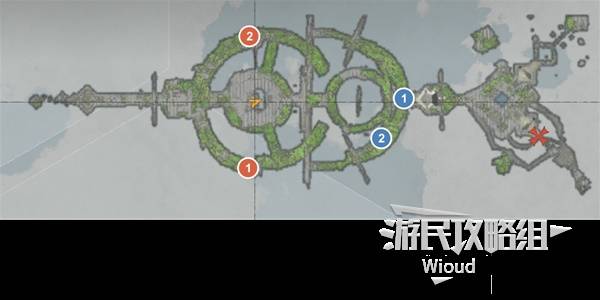
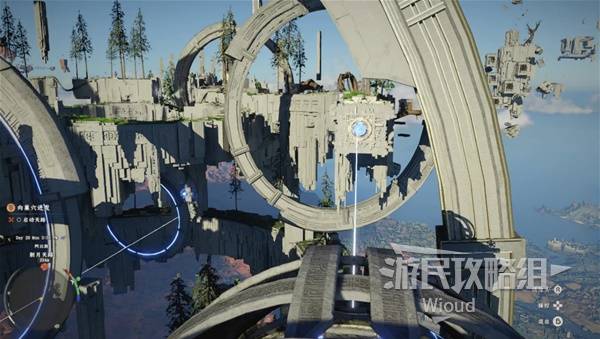
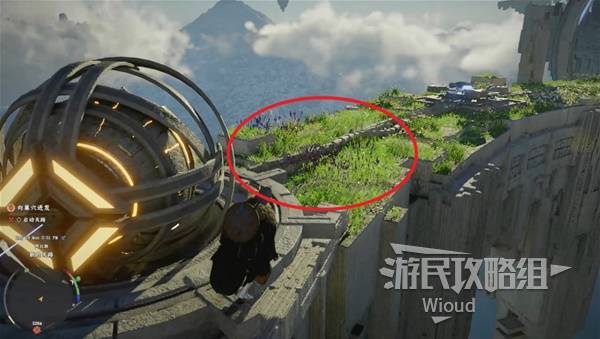
Image credit: GamerSky.com
After solving the puzzle, collect the Abyss Artifact from the black pillar:
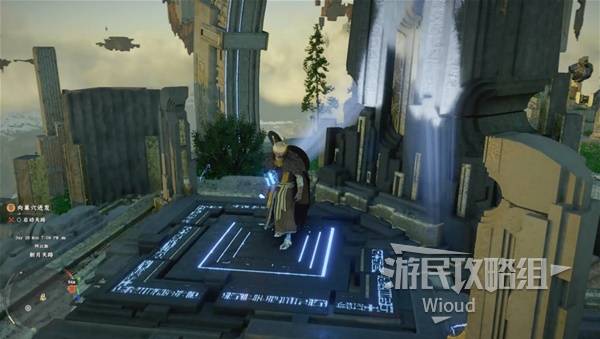
Image credit: GamerSky.com
Head to the triangular door at the end. Use Axiom Force to rotate the pillar and activate the mechanism:
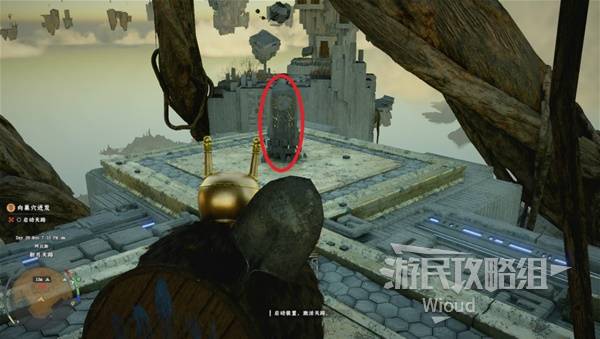
Image credit: GamerSky.com
Use the wind column to fly up, cross to the opposite platform, and stand on the central disc mechanism at the top. It teleports you to the boss arena.
Clear the enemy waves along the walkway to trigger the final boss fight.
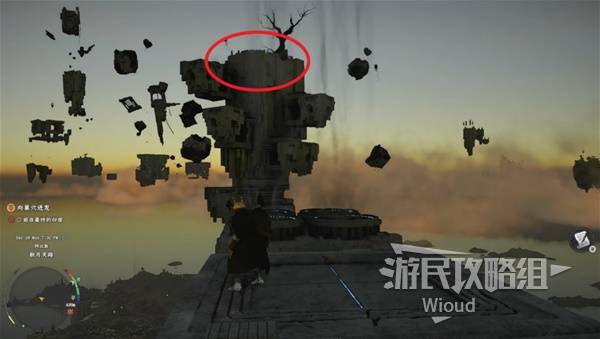
Image credit: GamerSky.com
BOSS: THE CROW SUMMONER (FINAL)
Compared to Kailok, this boss is much more manageable. Low poise — most attacks stagger him.
STRATEGY:
- Parry during his multi-hit combos, then counter with a full combo
- AERIAL ATTACKS: He flies up first, swoops once to reposition, then dives down. Dodge AFTER the second movement
- Phase 2: Aerial attacks become 2 consecutive dives
- Phase 3: 3 consecutive dives — same timing, just more dodges
Defeating the Crow Summoner rewards: "Taolia Scimitar," "Black Wing Leather Armor," and "Black Wing Plate Mask."
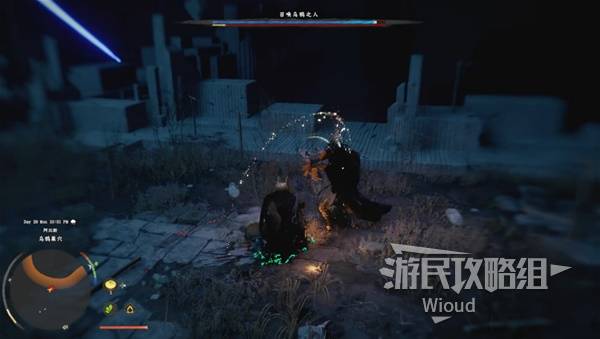
Image credit: GamerSky.com
NOTE: GamerSky's walkthrough ends here (last updated March 24, 2026). Chapters 6 and 7 walkthroughs will be added when the source material becomes available (expected March 26).
Image credits: GamerSky.com