Quest: Dance with the Devil
Location: Mountain of Frozen Souls (via Glenbright Manor)
Reward: Swift Stab Skill + Sunset Reed Cloth Gloves + 600 Hernandian Contribution
OVERVIEW
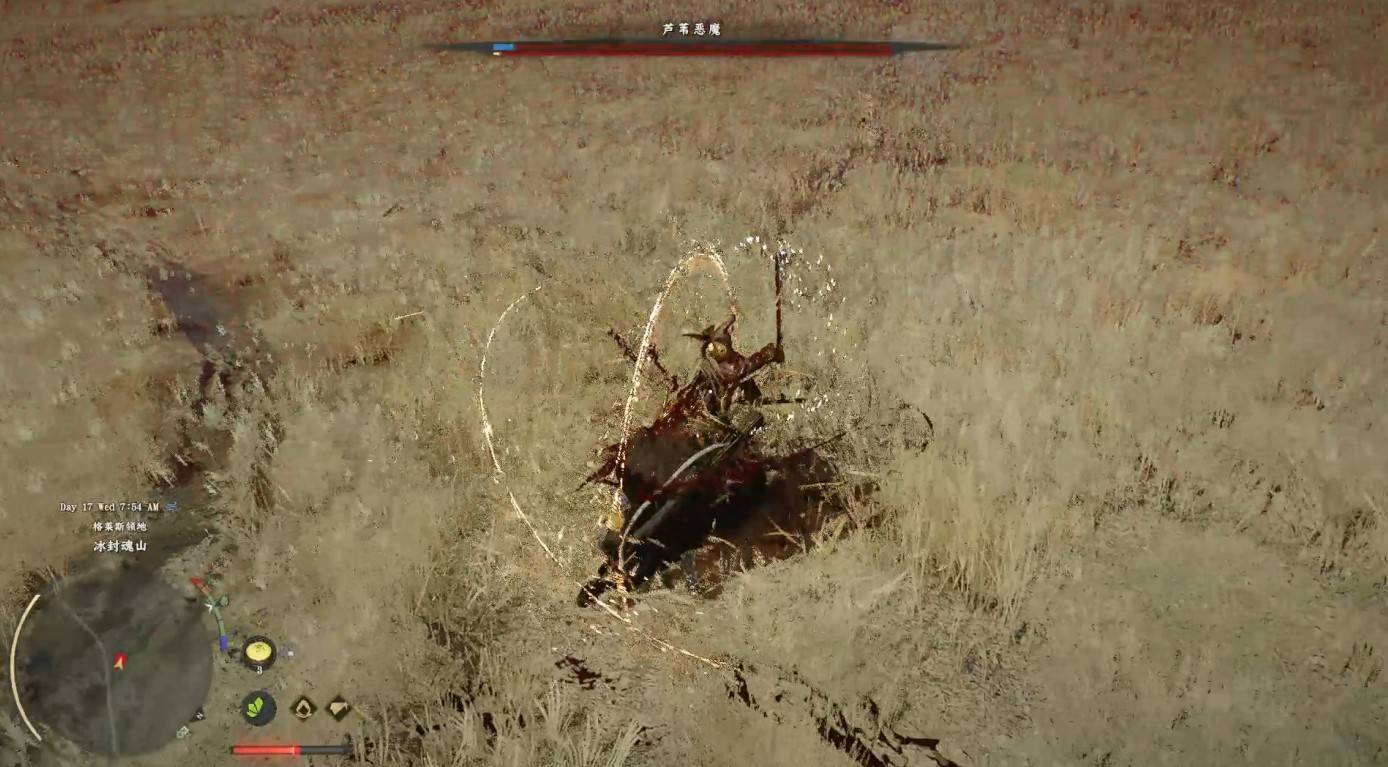
The Reed Devil is the first major boss in Crimson Desert's main storyline, encountered during the "Dance with the Devil" quest as Chapter 3 progresses through Hernand. This is a brutal test of your resources and gear level. The path to the arena is packed with enemies that will drain your food supply before you even reach the fight, so come prepared.
The Reed Devil fights with relentless speed across a wide, open arena of reeds. With 3 full health bars and two distinct phases, this is a battle of endurance and resource management.
PREPARATION
Gear Baseline (minimum recommended):
- Tier 3+ Canta Helm (from Hernandian reputation vendor)
- Tier 2+ Canta Plate Armor
- Tier 4 Sword of the Lord (from Kailok boss fight)
- Tier 2 Sydmon Round Shield
- Upgrade gear at the Blacksmith to boost defensive stats
If your gear feels weak, grind Hernand reputation and turn it in at the vendor in Hernand Castle for the Canta armor set.
Supplies:
- Bring 50+ Grilled Meat and Grains (craft at bonfires)
- Collect Battered Grains and Grilled Bird Meat from enemies on the path to the arena — free healing for the boss fight
- Carry 3 Palmar Pills for instant revival with 30% health (save these for emergencies)
Skills:
- Level both Health and Stamina as high as possible — extra stamina lets you dodge more, extra health lets you survive hits
- Blinding Flash (Left Bumper + Right Bumper) is the single most important ability for this fight
PHASE 1 — MELEE COMBAT
The Reed Devil moves rapidly around the arena with aggressive slashing combos. Key tactics:
- Keep your guard up at all times
- Parry his strikes to create counter-attack windows — timing is everything
- Dodge out of his flurry combos, as these deal devastating damage if they connect
- When he throws knives, simply block them with your shield — no need to dodge
The key ability: Blinding Flash. Use it to temporarily stun the Reed Devil and prevent his charged attacks. This holds him in place long enough to land a full combo. Time it correctly and you can shut down his most dangerous moves entirely.
Attack pattern: wait for him to finish a combo, use Blinding Flash to stun, unload damage, then back off and reset. Repeat across all health bars.
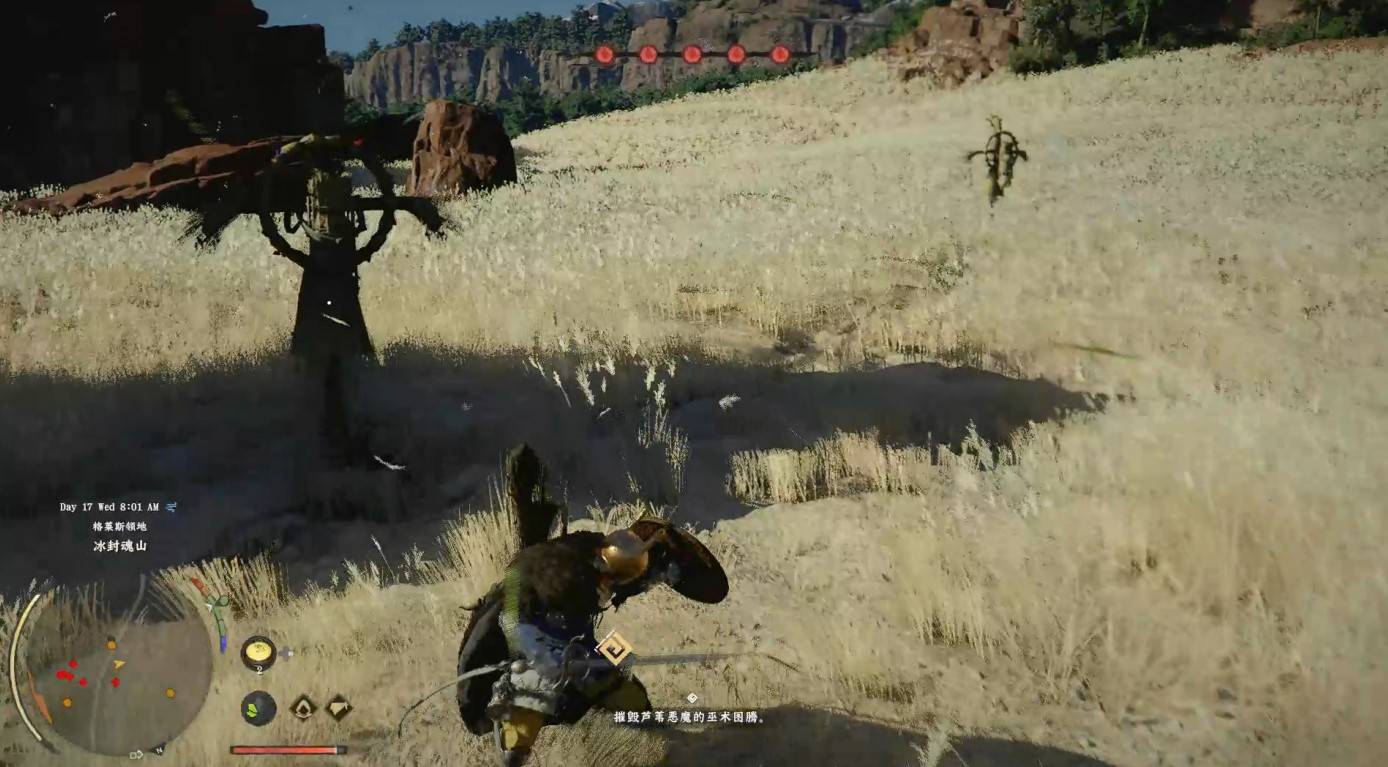
PHASE 2 — TOTEM DESTRUCTION
After depleting the first health bar, 5 totems appear around the arena. You must destroy all of them before the fight can continue.
How to destroy totems:
- Use a heavy attack (Right Bumper + Right Trigger with sword) or Palm Force
- Sprint between totems and destroy each with a few quick strikes
Survival tips during totem phase:
- Multiple copies of the Reed Devil will attack while you destroy totems — keep moving
- Dodge the Reed Devil's charged knife attack — it's very fast and repeats multiple times
- Don't run in straight lines between totems — zigzag to avoid ranged attacks
- Heal immediately if hit — patience is the goal here, not speed
- Watch the boss's position to avoid blindside attacks
PHASE 3 — FINAL PUSH
Same combat strategy as Phase 1, but the boss becomes noticeably more aggressive. When he dashes around firing red projectiles, dodge sideways from the far end of the battlefield.
Continue using the Blinding Flash stun loop. Keep healing while attacking to tank through damage. Save Palmar Pills for this phase if possible — the increased aggression makes mistakes more costly.
REWARDS
- Swift Stab Skill — perform a follow-up attack after a successful charged Stab
- Sunset Reed Cloth Gloves — armor piece with two perks: Fluttering Reeds + passive health regeneration (very useful for upcoming fights)
- 600 Hernandian Contribution — region reputation XP