⚠️ Editor note: Reference images from powerpyx.com (watermarked). Replace with original screenshots before final polish.
Video walkthrough
Its Shatter's full Tree of Slumber run (~14 minutes).
Skill overview
Flame Strike (Fire element Lv.1) is the fire-aligned skill of the four. Once unlocked, your weapon can carry fire damage that deals bonus damage to frozen enemies (the freeze-shatter combo), ignites enemies for damage-over-time, and roughly doubles your DPS against ice-aligned bosses.
Per-character variants:
- Kliff — Flame Strike: a sword combo finisher that releases a forward fire cone. Solid for clearing groups.
- Damiane — Flame Rush: a forward rapier thrust trailing flame, dealing bonus damage to ice-armored enemies and parry windows. Plays into her Steel Rose riposte loop.
- Oongka — Flame Quake: a downward greataxe smash with a fire shockwave AoE. Slow startup, huge burst — perfect for boss DPS windows.
The unlock is at Tree of Slumber, deeper down the same Abyss chain as Frost, which means you have to unlock Frost first. There's no shortcut.
Prerequisites
- Frost Mantle / Frost Lv.1 already unlocked (mandatory — same chain)
- Priscus the Ancient defeated
- Comfortable with Force Palm and Axiom Force
- Sword Stab (R1+Triangle / RB+Y) — taught in the tutorial
- Full health + healing potions (the puzzle is ringed by instant-kill lava)
- Recommended character level: 22+
Step 1: Push deeper from Path of Trials
After grabbing Frost, use the Abyss Nexus at Path of Trials to keep moving. The route to Tree of Slumber:
`
Path of Trials (done)
↓
Sanctorum of Darkness
↓
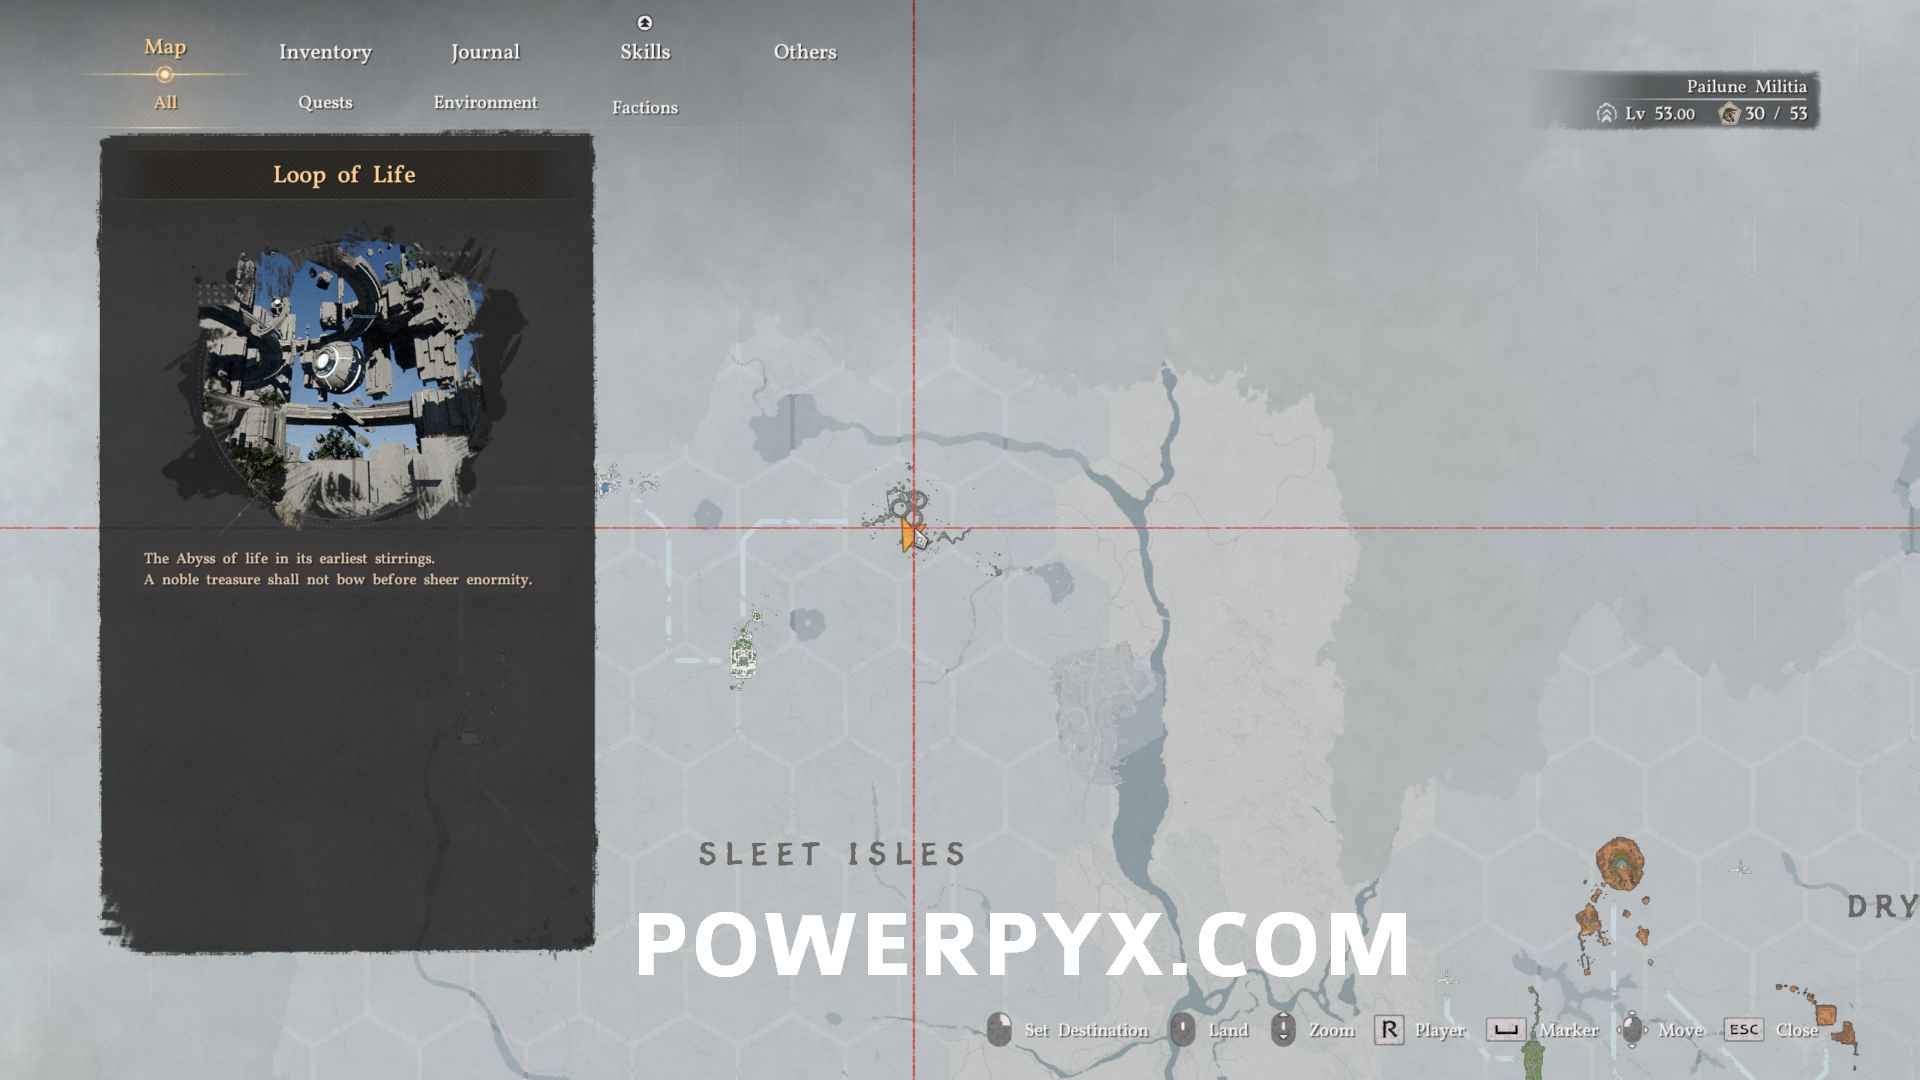
Loop of Life
↓
Tree of Slumber ← Flame element here
`
If you've left mid-chain, you can re-enter through the basement Abyss gate at the Spire of Ringing Truth. The Abyss Nexus system remembers your progress and lets you fast-travel to any node you've already cleared.
Map locations:
- Sanctorum of Darkness: https://crimsondesert.co/map?marker=72b8630a-cd25-40e5-8b15-028fa85f1b41
- Loop of Life: https://crimsondesert.co/map?marker=108e7fe2-e29a-43a0-8310-e4648c984b01
- Tree of Slumber: https://crimsondesert.co/map?marker=32d68543-a87e-4a41-b44b-d9313a6d28e0
Step 2: Pass through Sanctorum of Darkness and Loop of Life
These two nodes are transitions — they don't unlock anything, they just sit between you and Tree of Slumber.
- Sanctorum of Darkness: a dim cathedral-style room. Use lanterns and Force Palm to advance to the exit node. Follow the obvious platform line.
- Loop of Life: a rotating ring-bridge platform puzzle. Time your Force Palms across.
Neither is complex. Stick to the main path and keep Frost Mantle active for the cold protection.
Step 3: Enter Tree of Slumber
Tree of Slumber is unmistakable: a circular platform with a giant central stone pillar, surrounded by a moat of lava.
⚠️ Lava is instant death, so move carefully. The upside: falling in respawns you at the Abyss Nexus and resets the puzzle, so you can never get permanently stuck.
Around the central pillar are four outer pillars at the cardinal compass points. The base of the central pillar has four sockets, one facing each direction.
Your goal: lower all four outer pillars to 2/3 of their original height so they all glow blue at the same time.


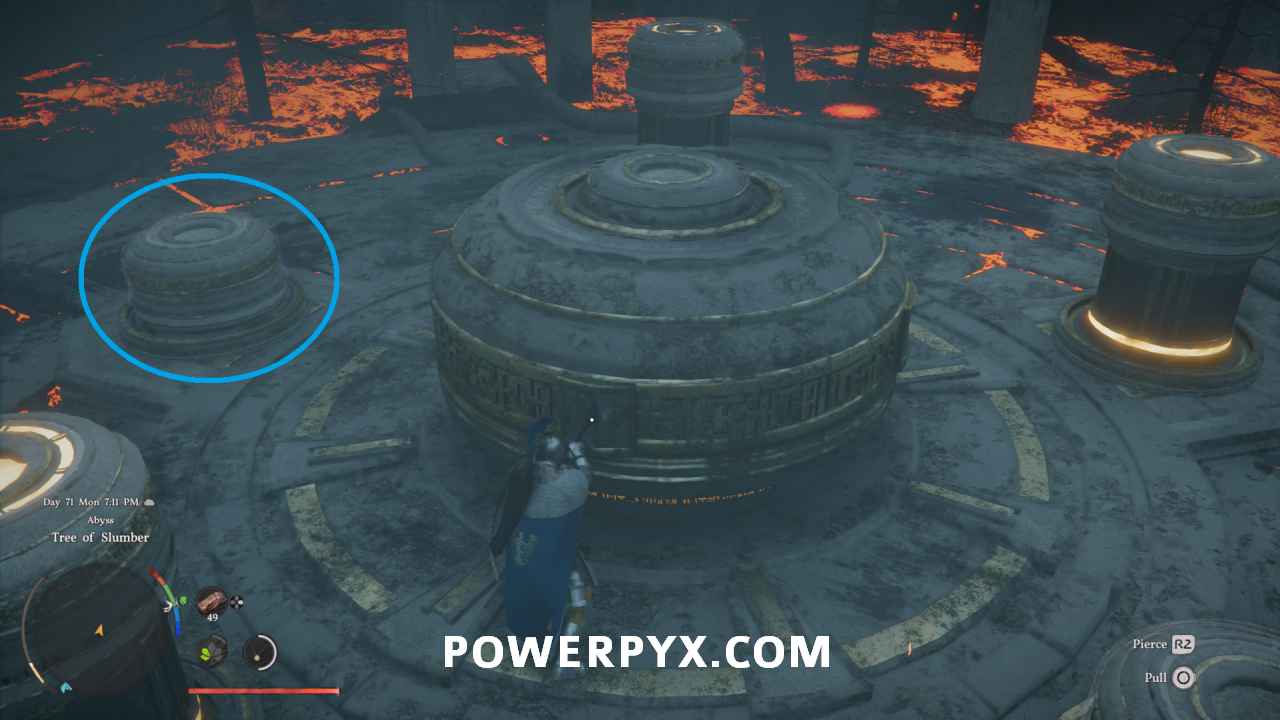
Step 4: The pillar rotation puzzle
Mechanic
Stab the sword into one of the central pillar's sockets → grip the handle and rotate left or right → the outer pillars rise or fall. Different sockets affect different outer pillars, and the rotation direction matters.
Exact solution (works every time)
Action A — first socket (the side facing away from your entry)
Walk around the central pillar to the side opposite your entry direction. Face the pillar and press R1+Triangle / RB+Y to stab the sword in. Hold the grip and rotate with the directional input / WASD.
Action B — second socket (one position clockwise)
Release the sword, walk one position clockwise, stab the next socket. Rotate clockwise this time. Keep rotating until the outer pillar to your left has dropped flush with the floor.
Action C — third socket (one more position clockwise)
Release, walk one more position clockwise, stab the third socket. Rotate counter-clockwise (left) here. Trim the remaining pillars to the 2/3 height target.
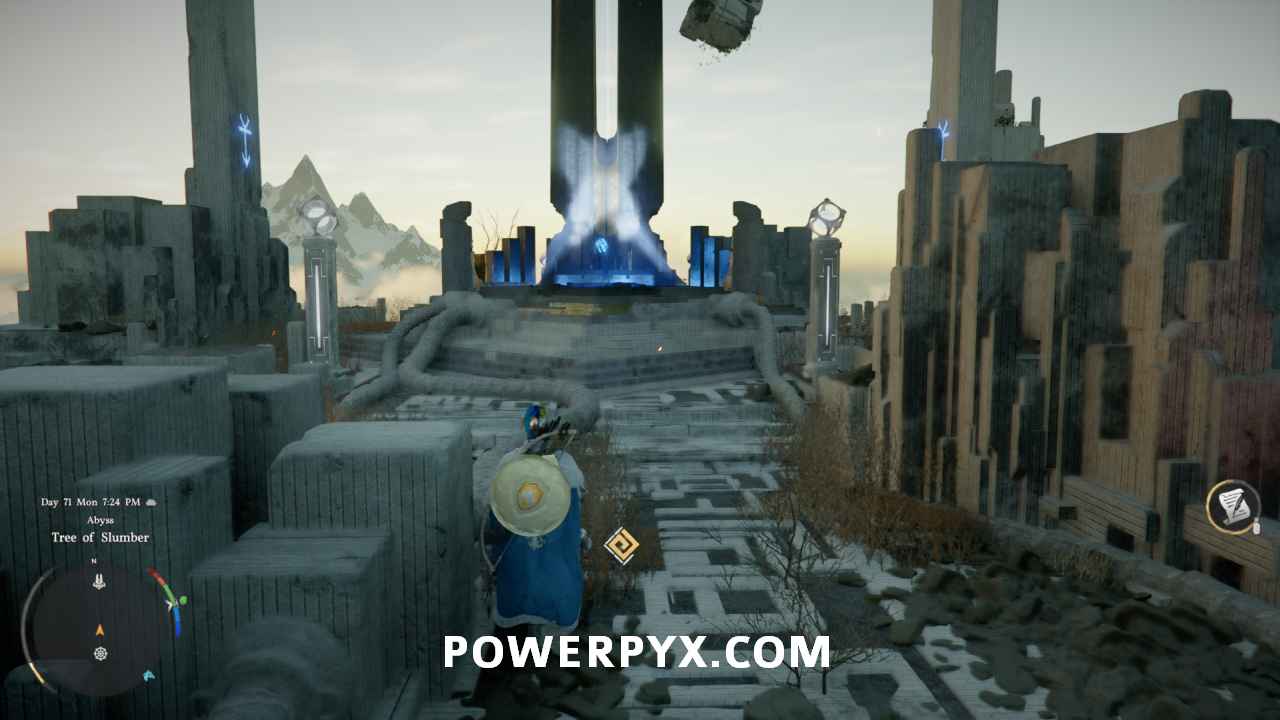
Action D — confirm the blue glow
When all four outer pillars glow blue simultaneously, you've solved it. If any pillar is red or unlit, you've rotated too far or not enough — go back to the matching socket and adjust.
Stuck?
Walk into the lava on purpose. You die instantly, respawn at the Abyss Nexus, and the puzzle fully resets. This is the intended reset mechanism — much faster than trying to undo your rotations by hand.
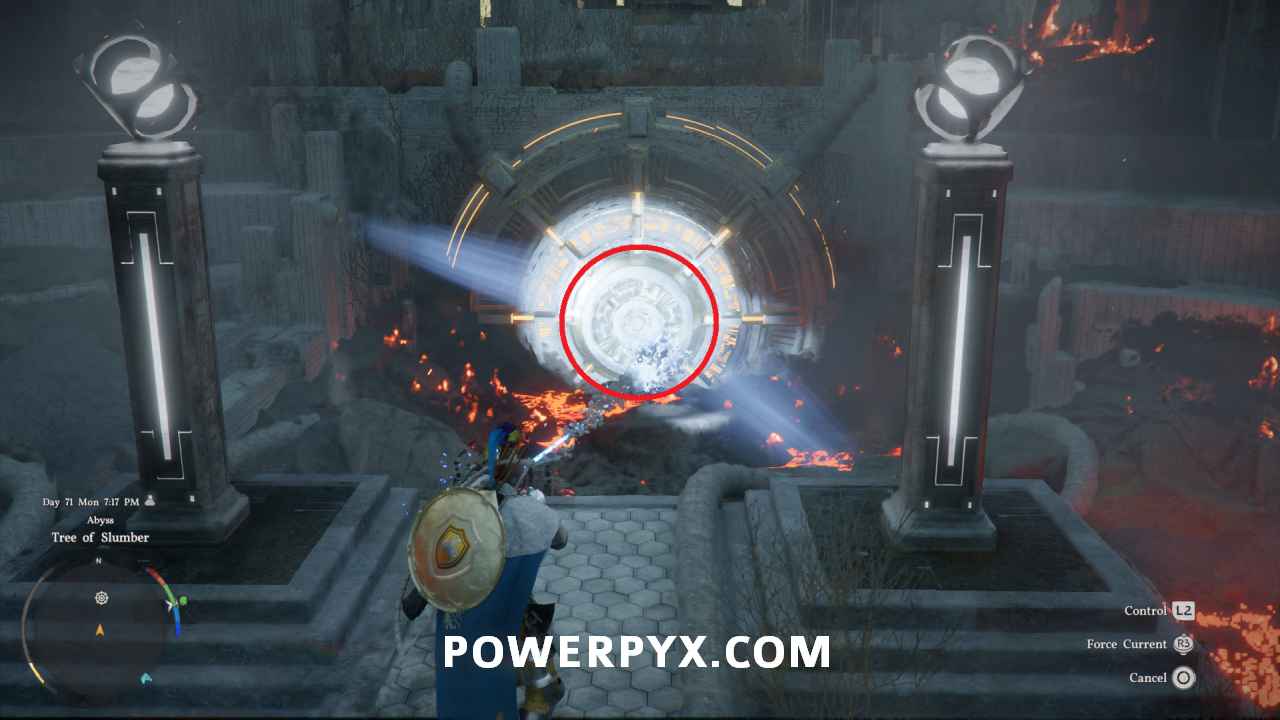
Step 5: Activate the switch & grab the artifact
When all four outer pillars are blue, a large circular switch appears on top of the central pillar. Two ways to hit it:
Safe method (recommended)
Remote control: use Axiom Force (hold L2 / Tab) to grab the switch from a distance, then trigger it with Force Current (gravity push) from where you're standing. This keeps you completely off the lava edge.
Direct method
Use Force Palm to jump on top of the switch and slam it. Faster but risky — one slip and you're in the lava.
After activation, the Abyss Artifact appears on the central pillar. Climb up and grab it — confirmation: Flame Lv.1 unlocked! All three characters now have the Fire element, and the Axiom Bracelet can imbue any weapon with fire damage.
Pre-run checklist
- [ ] Frost element unlocked (prerequisite)
- [ ] Full health potions
- [ ] Manual save before entering Tree of Slumber
- [ ] Sword Stab inputs refreshed (R1+Triangle / RB+Y)
- [ ] Comfortable landing Force Palms near lava edges
Common mistakes
- Falling into lava: instant death. Rotation animations nudge your character, so plant your feet before turning.
- Wrong socket: each of the 4 sockets controls a different outer pillar. If you rotate and the wrong pillar moves, back out and try the next clockwise socket.
- Over-rotating past 2/3: the goal is exactly 2/3 of the original height. Past it and the blue glow drops; reverse-rotate slightly.
- Don't know Sword Stab: it's R1+Triangle (PS) / RB+Y (Xbox), distinct from a normal attack — practice it once on flat ground first.
- Bouncing off the switch with Force Palm: use the Axiom Force remote method, it's safer.
- Can't find Tree of Slumber: it's the fourth node on this chain — you must clear Path of Trials → Sanctorum of Darkness → Loop of Life first. No direct fast-travel point on the world map.
What's next
With Flame, you have half of the four elements. Two more to go:
- Lightning Surge — opens up after Chapter 4 main quest, via Spire of the Stars chain through Courtyard of Precision
- Storm Veil — opens up after Chapter 8, via Spire of Clockwork
The Frost + Flame combo also has a powerful interaction: freeze with ice, then break the ice armor with fire. Devastating on heavy-armor bosses.
👉 Next up: Lightning Surge unlock guide