The Azure Moon Labyrinth is one of the most involved Ancient Ruins puzzles in Crimson Desert. Located beneath Phoniel Ranch in the Alfonso Estate area of Hernand, this multi-step challenge requires you to navigate fire traps, decode a wall mural, find five hidden symbols in the outside world, then return to activate the correct buttons.
Rewards: Abyss Artifact, Memory of Tide (reveals the Echoing Waves Cave), and a fast travel point (Abyss Nexus).
Location & Entrance
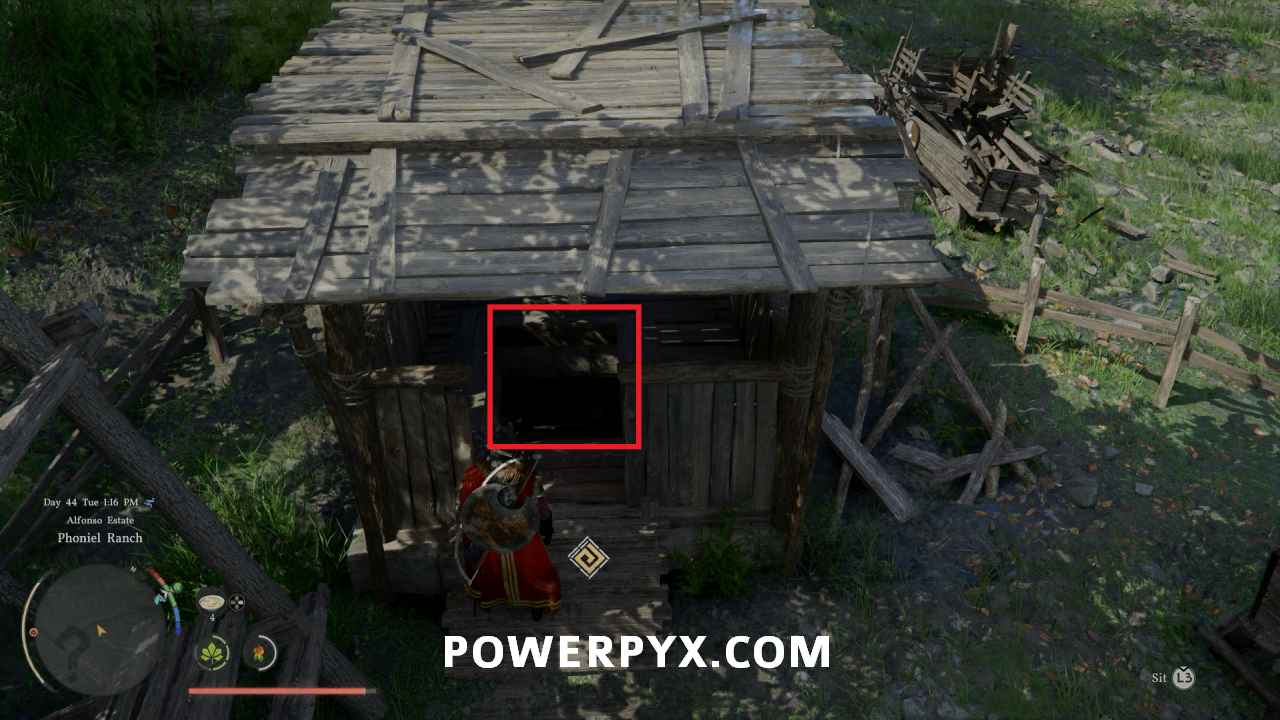
Region: Hernand > Alfonso Estate > Phoniel Ranch
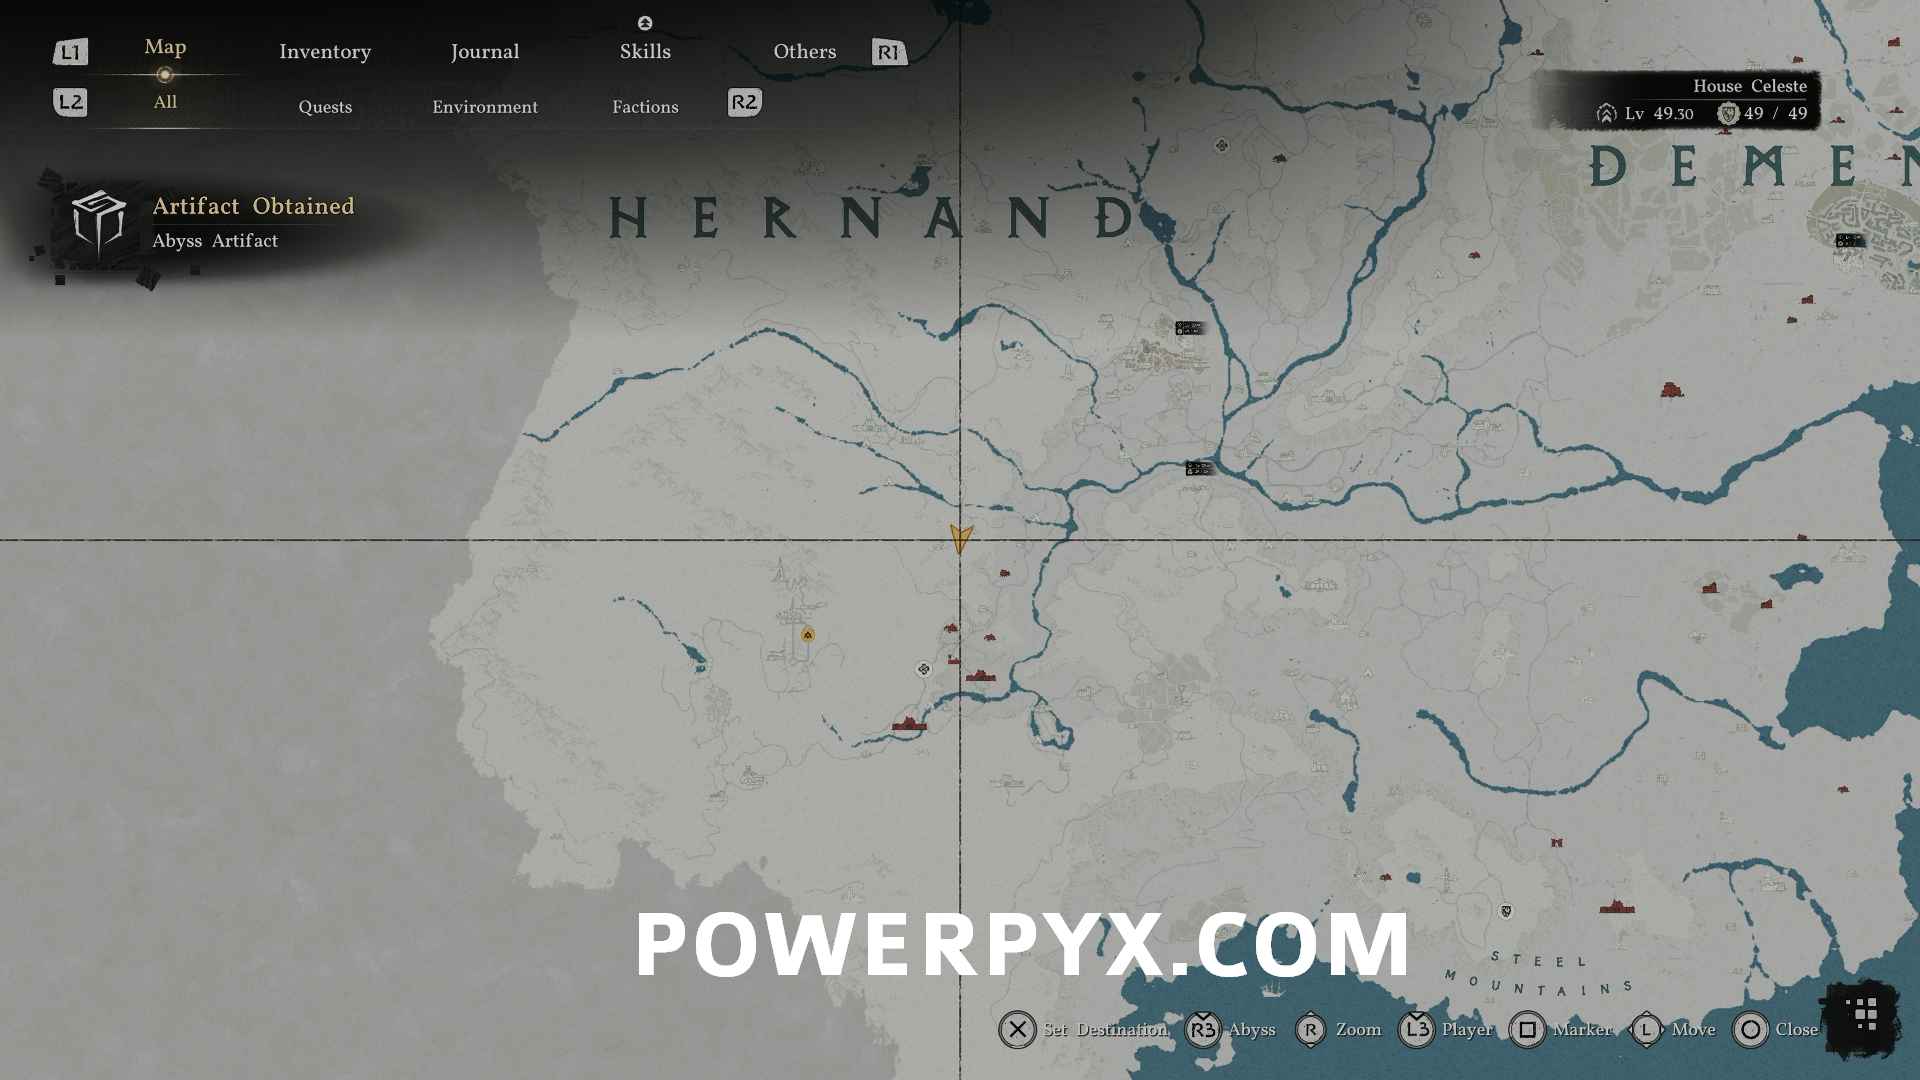
Head to Phoniel Ranch and find an abandoned wooden shack. Inside is a ladder leading underground — this is the labyrinth entrance. There may be a locked cave door nearby; ignore it, that's not the way in.
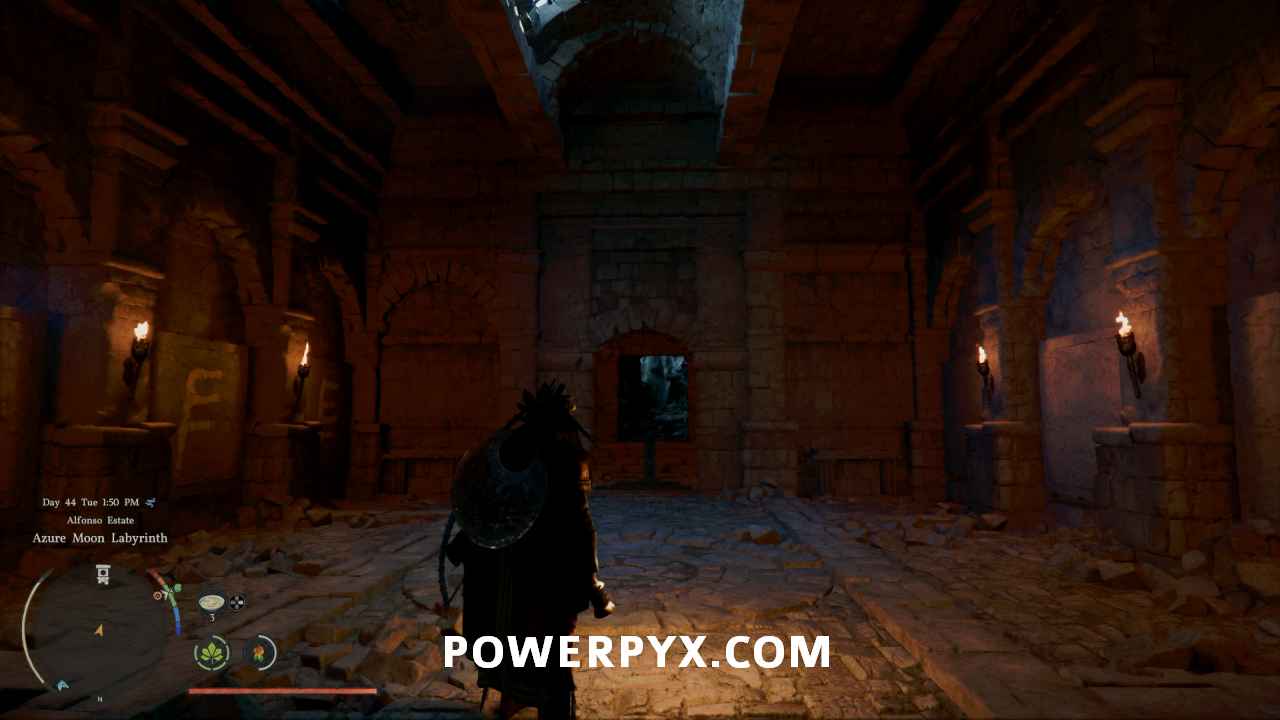
Step 1: Fire Trap Corridor
Immediately after descending the ladder, you'll face fire-shooting traps. Multiple ways to get through:
- Force Palm Jump — most reliable method
- Double Jump — requires good timing
- Glide + Dive — fast but tricky to control
- Climb the sides — safest but slowest
Pass the first set of flames to reach a platform, then repeat for the second set. Continue through the gate into the puzzle room.
Step 2: Read the Wall Mural
Inside the puzzle room, find the cracked wall with a painted mural. This is an overhead map of Pororin Forest showing large trees surrounding a small village. Each marked tree has a unique symbol carved into its trunk.
Do not press any buttons yet. Leave the labyrinth and head to Pororin Forest to find the symbols first.
Step 3: Find 5 Symbols in Pororin Forest
Pororin Forest is near Phoniel Ranch. Search for trees with white markings — each one shows a symbol you'll need to remember:
- Symbol 1 — P with three lines: Southeast of Pororin Village — View on Map
- Symbol 2 — Letter P: Deep in the forest, north of the village — View on Map
- Symbol 3 — Letter F: Deep in the forest, northwest of the village — View on Map
- Symbol 4 — P with one line: Florindale woods, at the forest edge — View on Map
- Symbol 5 — F with two lines: Near Reachwood Ruins — View on Map
Take a screenshot or write them down before heading back to the labyrinth.
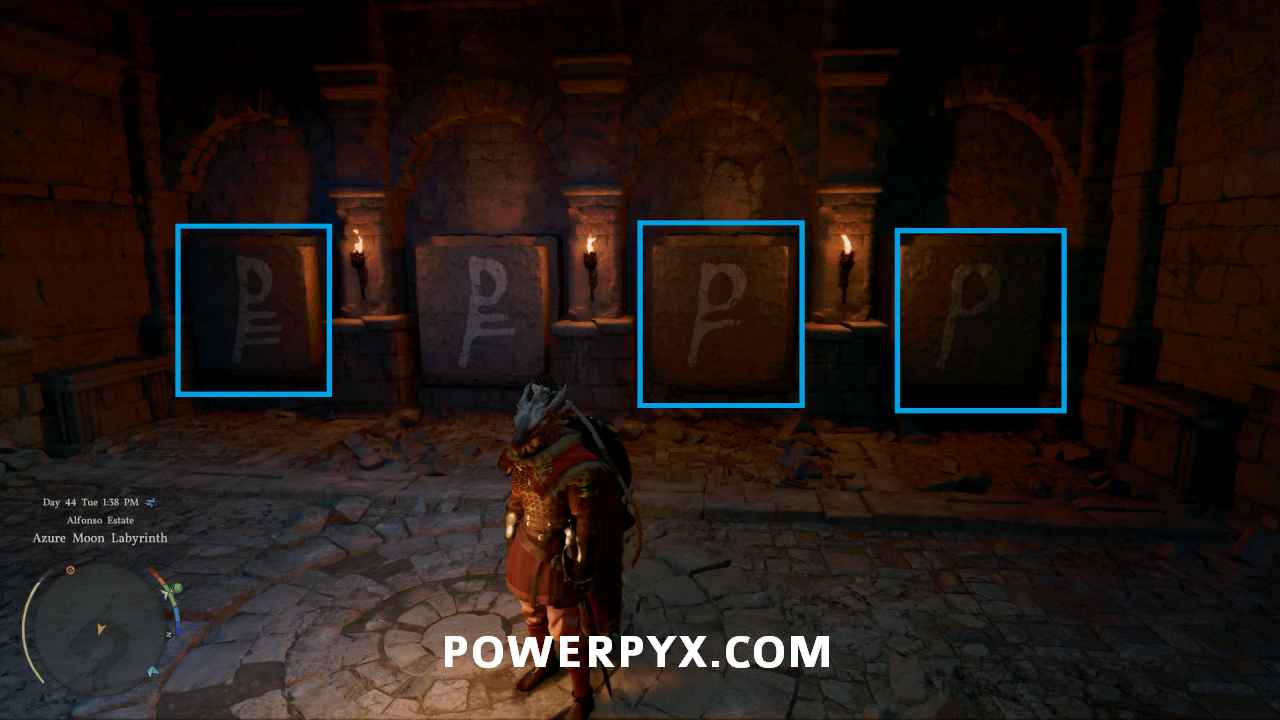
Step 4: Solve the Button Puzzle
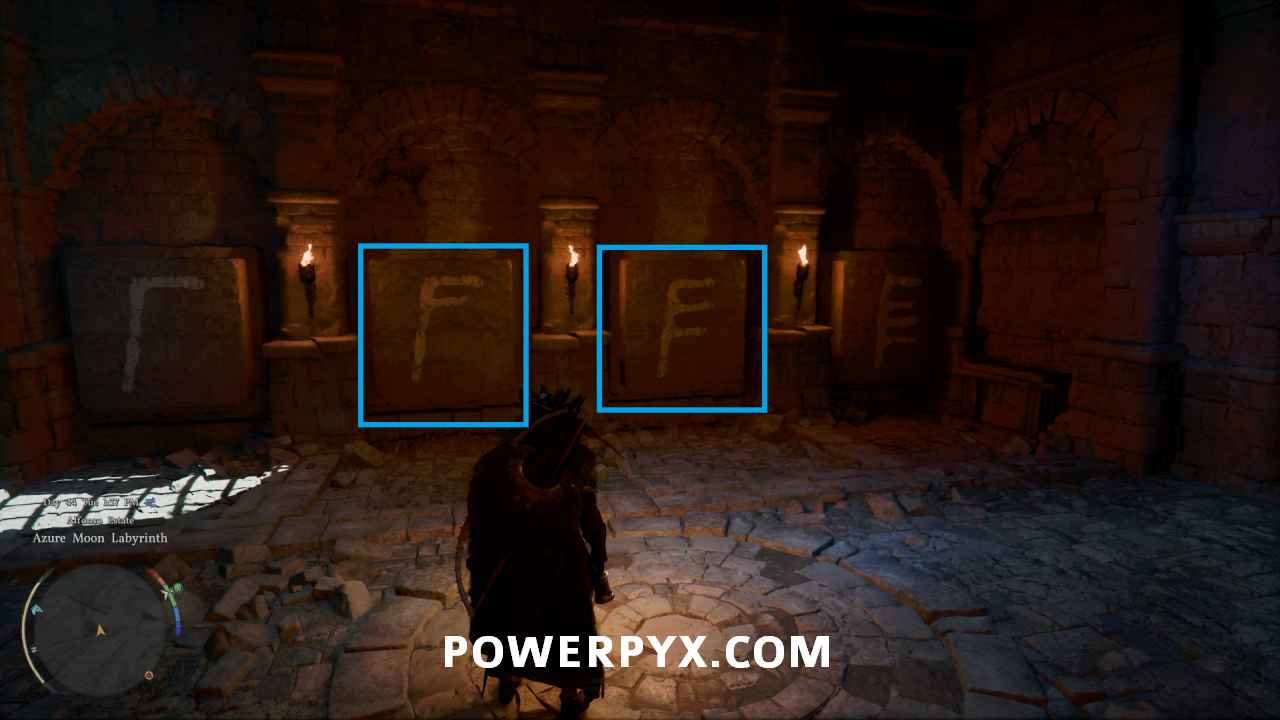
Back in the puzzle room, there are 8 buttons spread across two walls. You need to press exactly 5 of them. Order does not matter — just get the right five.
Solution:
- "F" symbol wall: Press buttons 2 and 3
- "P" symbol wall: Press buttons 1, 3, and 4
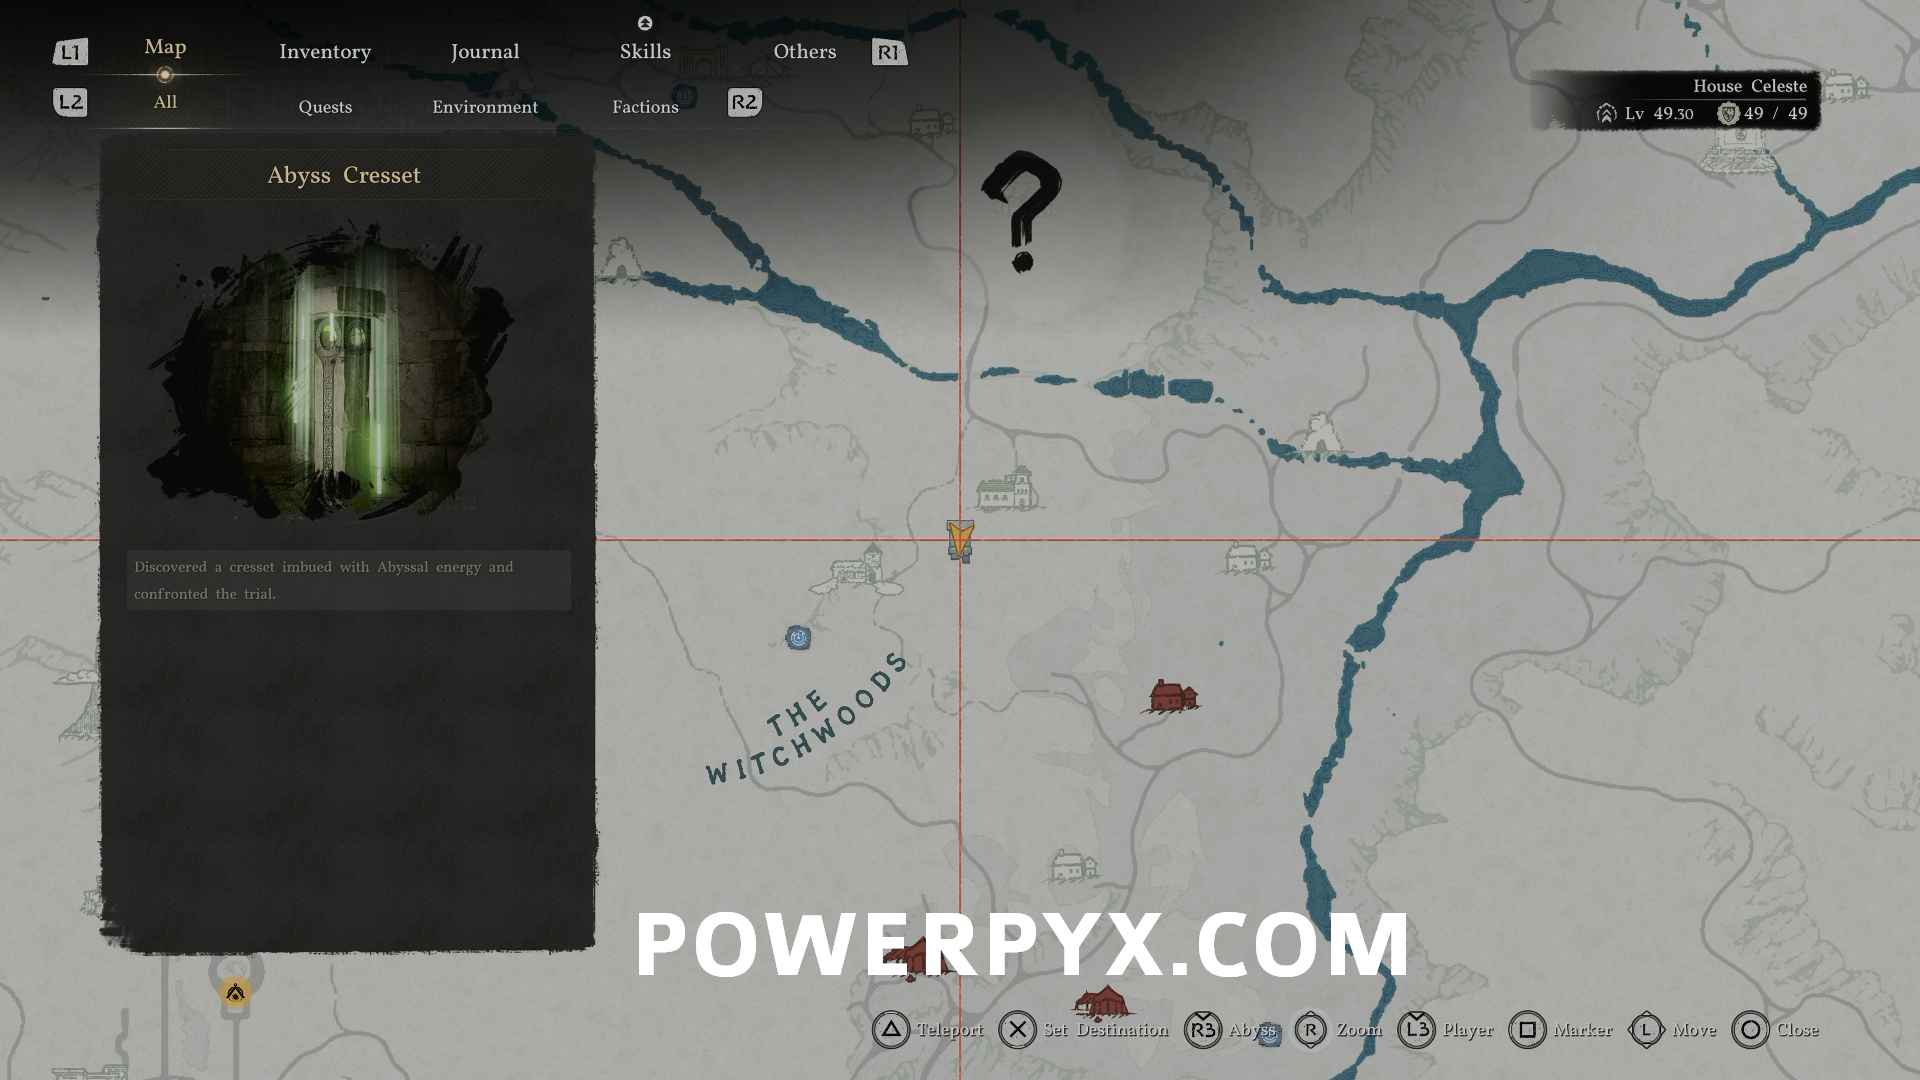
Once all five correct buttons are pressed, the gate protecting the Abyss Cresset opens automatically. An exit door also appears so you don't have to go back through the fire traps.
Rewards
Interact with the Abyss Cresset to claim:
- Abyss Artifact — powerful upgrade material
- Memory of Tide — reveals the hidden location of the Echoing Waves Cave
- Fast Travel Point — this location becomes an Abyss Nexus for instant teleportation