LOCATION
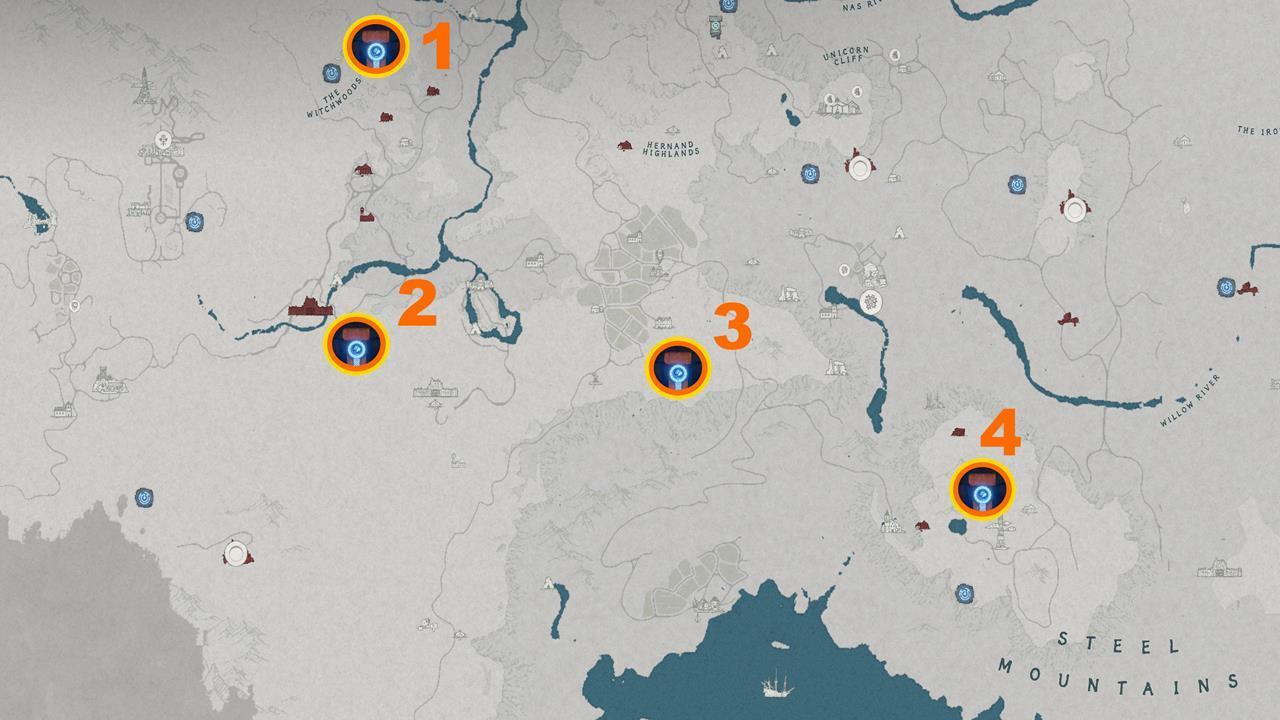
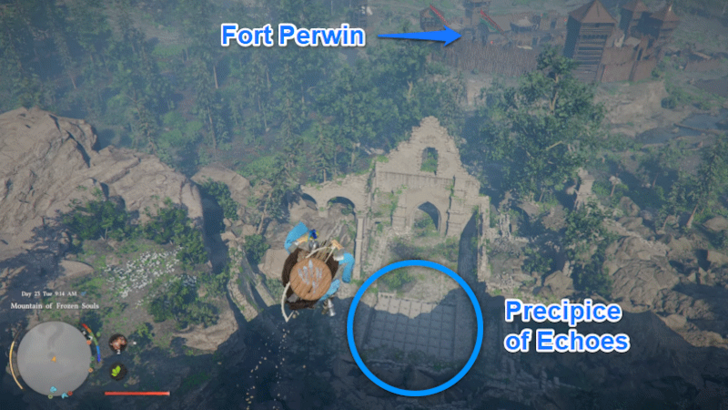
Directly south of Fort Perwin, near the northern foothills of the Mountain of Frozen Souls. Marked as "Mysterious Energy" on the world map. You may stumble upon it while traveling to the Scholastone Research Institute.
PUZZLE RULES
This is a Stepping Stone Symbol puzzle. The ground has a square grid with special symbols on certain tiles.
CORE RULES
- Step on a symbol tile then walk to the matching symbol tile to complete a pair
- Cannot step on tiles you've already walked on (each grey tile can only be used once)
- Cannot step on other active symbol tiles (only step on the current target symbol)
- Wrong step or repeated tile = puzzle resets
THREE ROUNDS
The puzzle has three rounds of increasing difficulty:
| Round | Symbol Pairs | Difficulty |
|---|---|---|
| Round 1 | 1 pair | Simple — straight line |
| Round 2 | 3 pairs | Medium — plan your route to avoid used tiles |
| Round 3 | 5 pairs | Hard — precise global route planning needed |
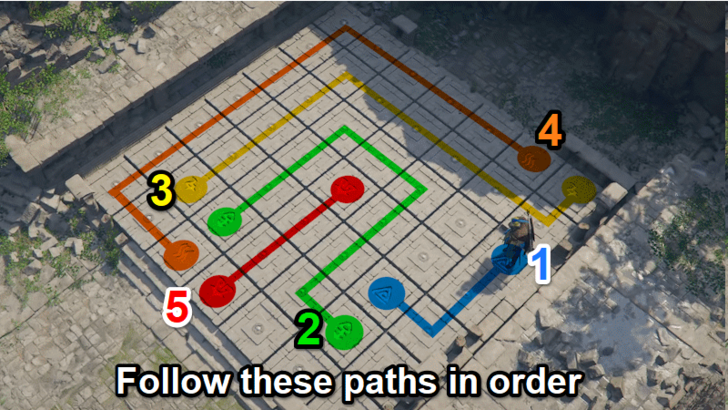
SOLUTION
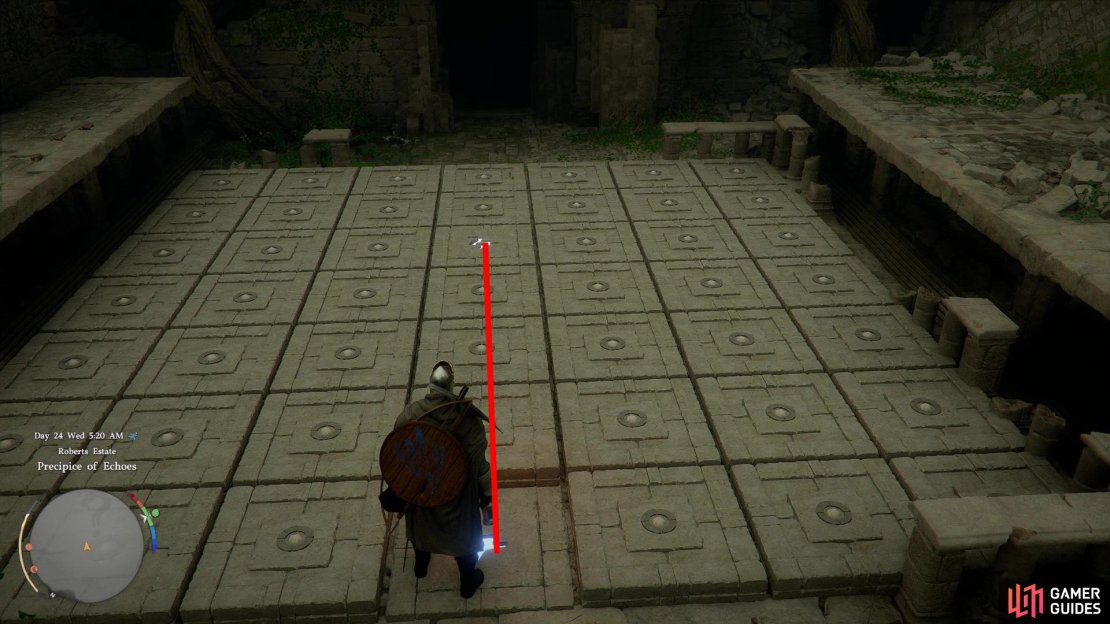
ROUND 1 (1 PAIR)
Easiest round. Find the two matching symbols and walk straight between them.
ROUND 2 (3 PAIRS)
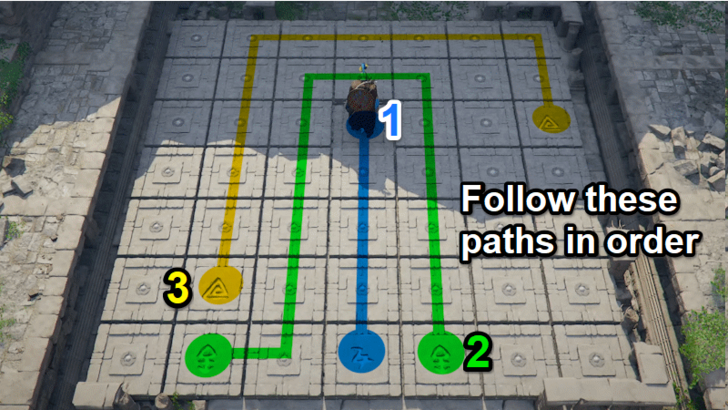
Start planning your routes. Key principles:
- Observe first: Stand at the edge and study all symbol positions before stepping
- Start from edges: Connect edge symbols first, keeping center paths open for later pairs
- Avoid dead ends: Don't create routes that split the grid in half
ROUND 3 (5 PAIRS)
The hardest round. Strategy:
- Hold your lantern (CTRL / LB) to slow-walk — prevents accidentally stepping on wrong tiles due to frame rate issues
- Start from corner symbols — corners have the fewest route options, solve them first
- Plan the full route mentally — map all connections before stepping to ensure paths don't cross or overlap
Warning: If your frame rate drops, your character may overstep by one tile, causing a reset. Strongly recommend slow-walking with lantern or lowering graphics settings for stable performance.
STEP-BY-STEP PROCESS
| Step | Action |
|---|---|
| 1 | Walk to the puzzle edge, hold lantern (CTRL/LB) |
| 2 | Study all symbol positions, plan connection order |
| 3 | Step on first symbol tile, slow-walk to its matching tile |
| 4 | Step on next symbol tile, route around used paths to its match |
| 5 | Repeat until all pairs are connected |
| 6 | Ground mechanism opens — walk to center to claim reward |
REWARD
- Abyss Artifact x1 — key resource for unlocking Abyss Gear skill tree abilities
- Abyss Cresset activated — becomes a fast travel point
TIPS
- Lantern = slow walk mode — the single most important technique for this puzzle
- Don't panic if you fail — the puzzle auto-resets, just try again
- Trial and error is fine — try a route, remember what doesn't work, adjust after reset
- No time limit — take as long as you need
- Visit during daytime (in-game) for better visibility of the symbols
RELATED ANCIENT RUINS IN SOUTHERN HERNAND
| Ruins | Puzzle Type | Location |
|---|---|---|
| Precipice of Echoes (this guide) | Stepping Stone Symbol | South of Fort Perwin |
| Azure Moon Labyrinth | Mural Puzzle | Deep below Witchwoods |
| Sunrise Plains | Statue Rotation | South of Glenbright Manor |
| Steel Mountains | Bell Sequence | Near Spire of Insight |