Crimson Desert's world of Pywel is dotted with Ancient Ruins, each containing a puzzle challenge. Completing a puzzle activates a nearby Abyss Cresset (fast travel point) and rewards an Abyss Artifact for unlocking abilities.
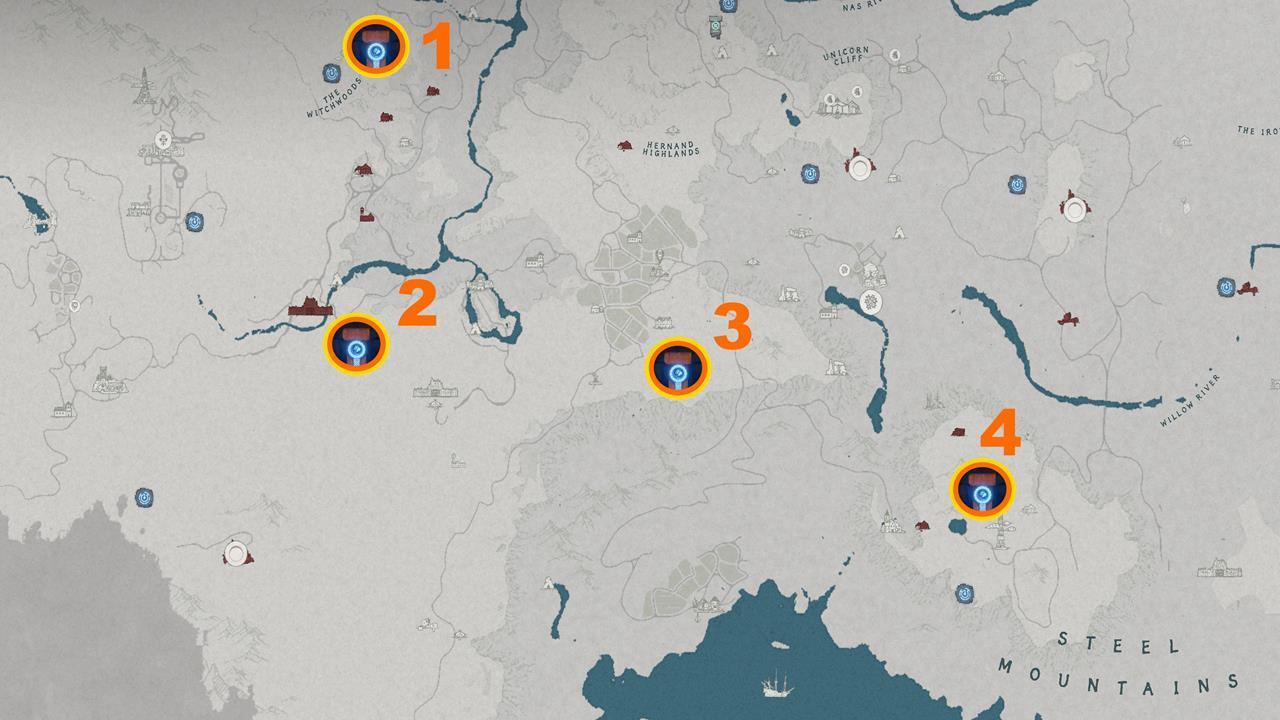
This guide covers all 16 Ancient Ruins in the Hernand region — locations, puzzle types, and step-by-step solutions.
PUZZLE TYPES OVERVIEW
| Puzzle Type | Description | Count |
|---|---|---|
| Statue Rotation | Rotate statues to face the center pedestal | 2 |
| Pillar Height | Adjust pillars to match the reference height | 2 |
| Angel Statue | Rotate dial to match symbols hit by beam | 1 |
| Stepping Stone | Step on matching symbol pairs via connected paths | 1 |
| Bell Sequence | Strike bells in the correct order | 1 |
| Water Drain | Use Nature's Snare to drain water | 1 |
| Mural | Decipher clues from murals | 2 |
| Board Piece | Place a piece in the correct position | 1 |
| Lantern | Use Visione to find and light all lanterns | 1 |
| Red Light Green Light | Approach king statue without being seen | 1 |
| Runestone | Hit correct runes with Concentrated Light | 1 |
| Sliding Block | Rearrange blocks to form a picture | 1 |
CENTRAL HERNAND (7 RUINS)
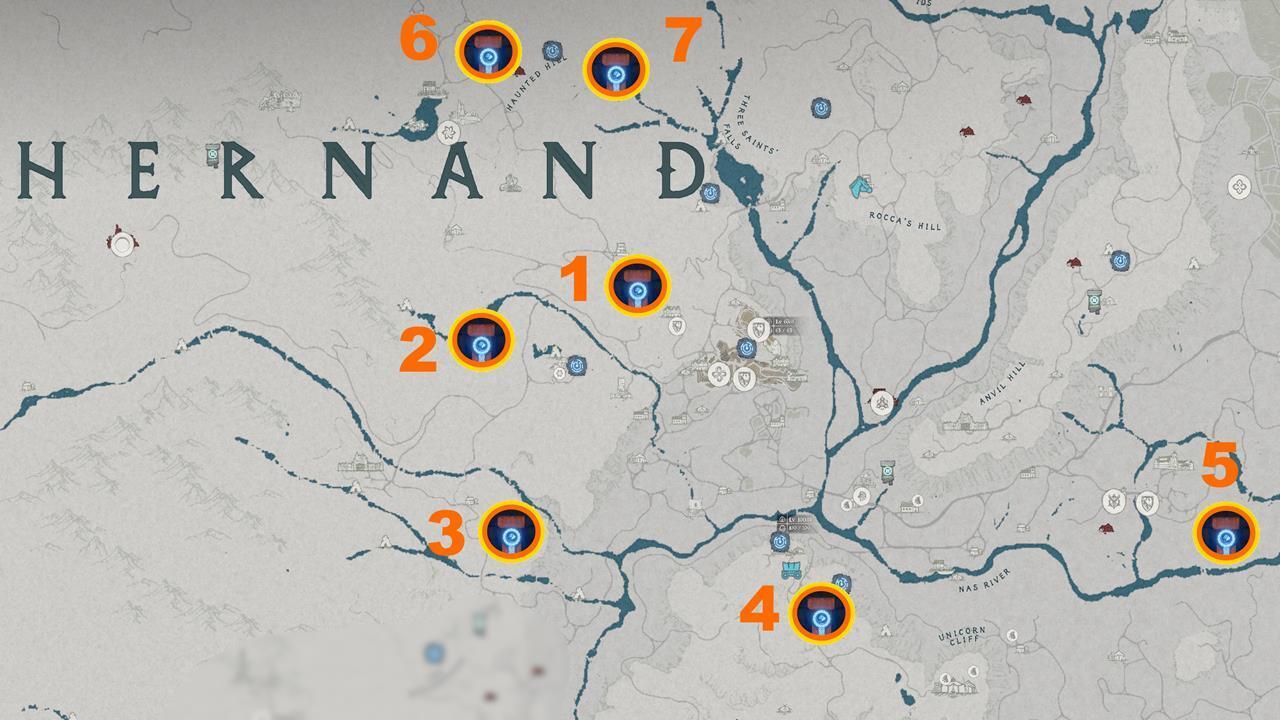
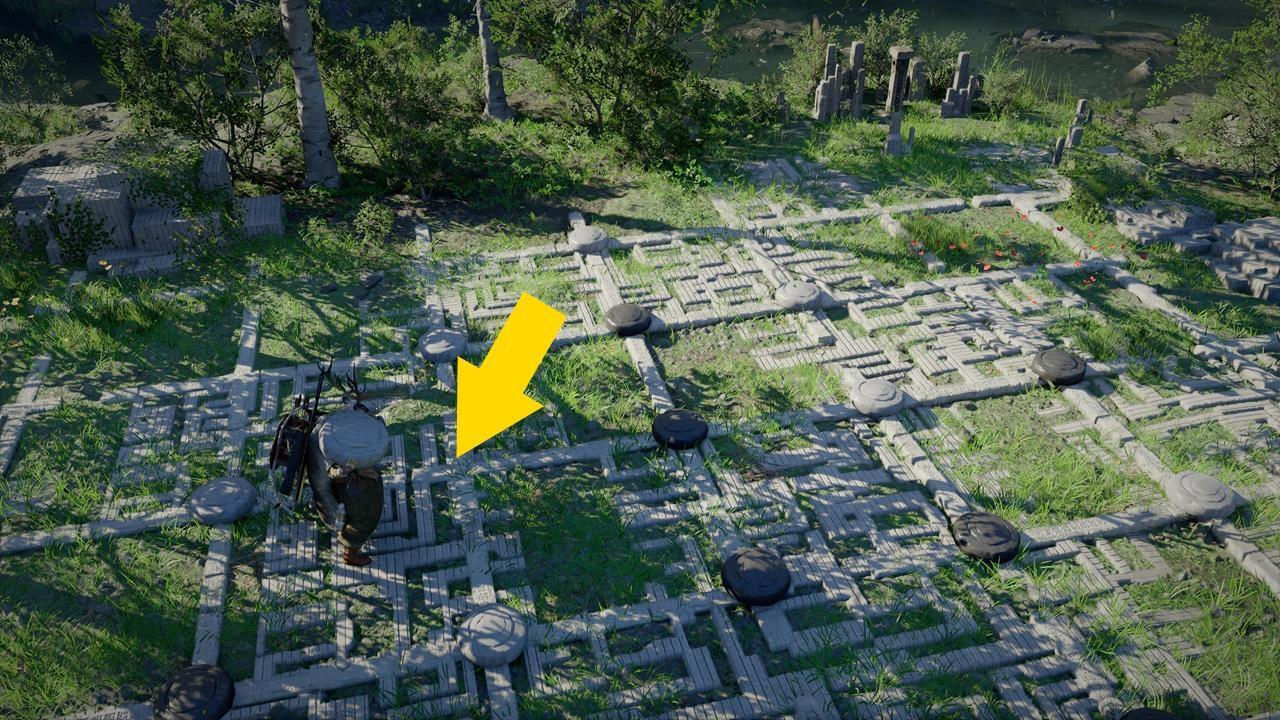
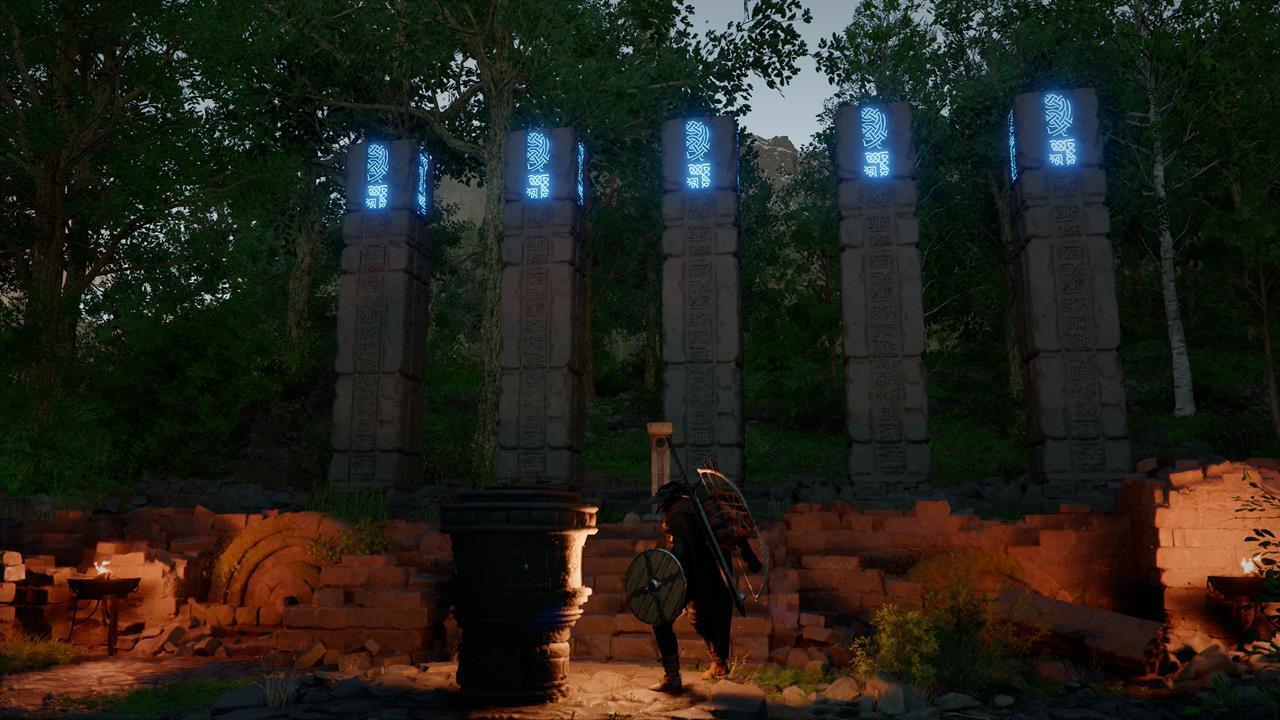
- MEANDERING HILLS RUINS
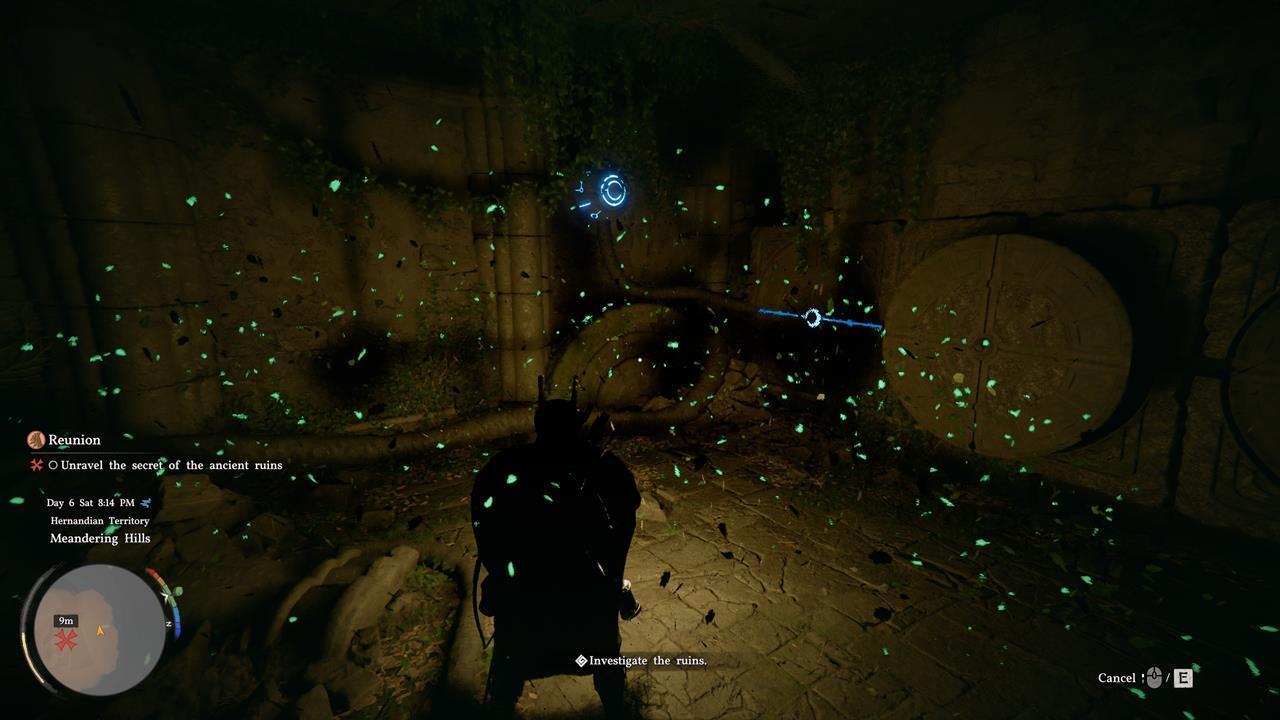
Type: Stone Plate Sequence
Location: Northwest of Hernand city (unmissable — part of Act 2: Unexpected Gift - Reunion)
Solution:
- Use Nature's Grasp to lift the stone wall
- Use Force Palm to hit the stone plates in order: Middle → Left → Right
- DUSKWOOD WATERSIDE RUINS
Type: Board Piece Placement
Location: Directly west of Kilnden Workshop
Solution:
- Pick up the white stone near the cresset/small pillar
- Place it on the empty space in the row
This is the simplest ruins puzzle — takes seconds to complete.
- DUSKWOOD HILL RUINS
Type: Pillar Height Adjustment
Location: Between the twin rivers south of Kilnden Workshop, west of Howling Hill
Solution:
Goal: Make all pillars match the height of the leftmost pillar. The central mechanism has 4 sockets — use Stab to operate:
| Socket | Controls |
|---|---|
| Socket 1 | Pillars 2 and 4 |
| Socket 2 | Pillars 2 and 5 |
| Socket 3 | Pillars 2, 3, and 4 |
| Socket 4 | Pillars 3, 4, and 5 |
Quick solution:
- Socket 2: Raise pillars 2 and 5 (not to full height)
- Socket 3: Raise pillars 2, 3, 4 (pillar 2 should be taller than pillar 1)
- Socket 4: Raise pillars 3, 4, 5 (pillars 3 and 4 should match pillar 1)
- Socket 2: Lower pillars 2 and 5 → all equal height, done
- DRAGON'S STONE CHAMBER RUINS
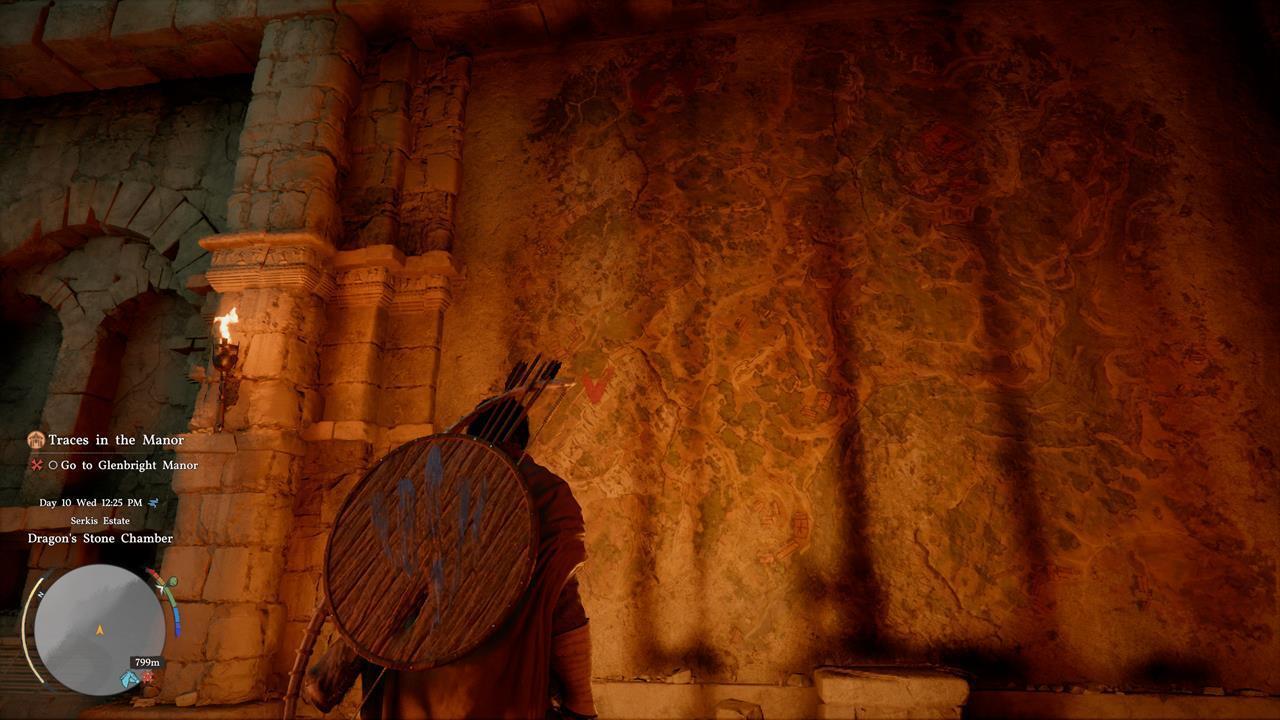
Type: Mural Puzzle (Complex)
Location: Cave carved into a cliff face due east of Greymane Camp at Howling Hill
Solution: Complex mural puzzle requiring clues from multiple locations. ➡️ [Full guide: Dragon's Stone Chamber Mural Puzzle Solution](/guides/dragons-stone-chamber-puzzle-solution)
Completing this puzzle reveals all hidden cave locations on the world map — extremely valuable.
- HALSSIUS CONFLUX RUINS
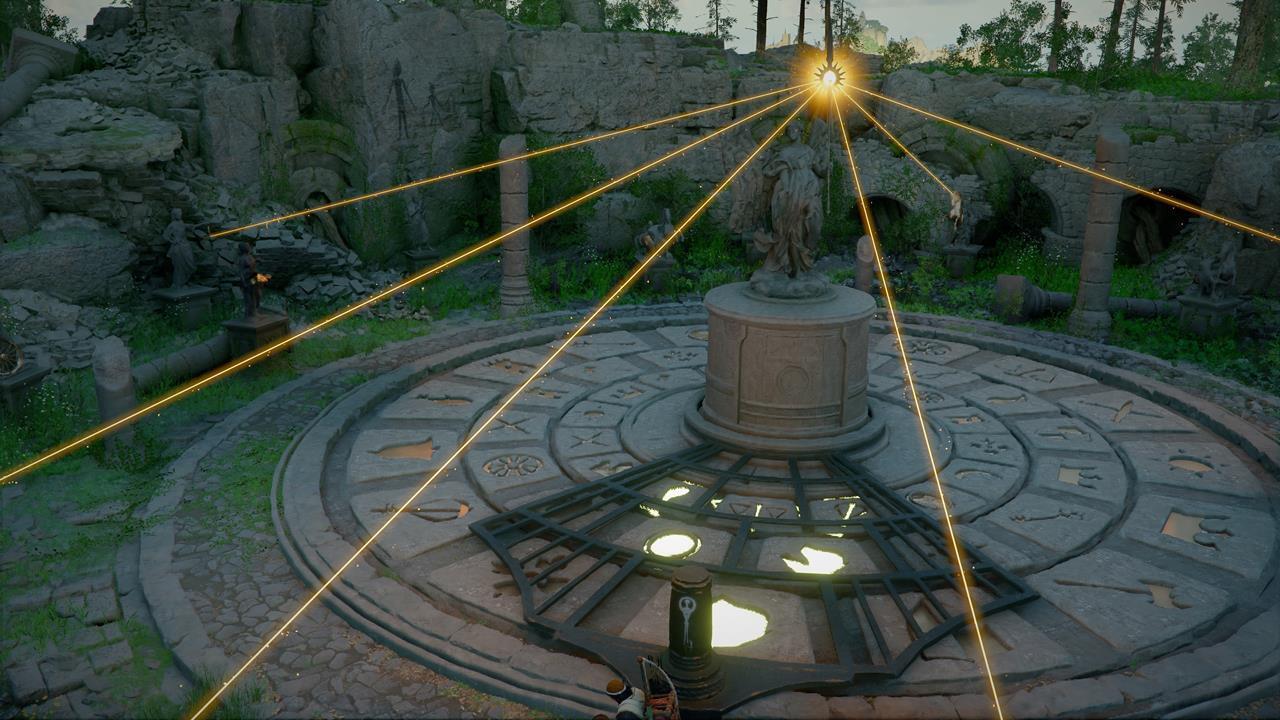
Type: Angel Statue Symbol Match
Location: On a hill due south of St. Halssius House of Healing
Solution:
The Angel Statue's beam points at nearby statues holding objects. Use Stab to rotate the selection dial to match the symbols.
| Round | Symbols to Select |
|---|---|
| Round 1 | Plate |
| Round 2 | Lyre, Vase, Scales |
| Round 3 | Horse x2, Lyre, Scales, Plate |
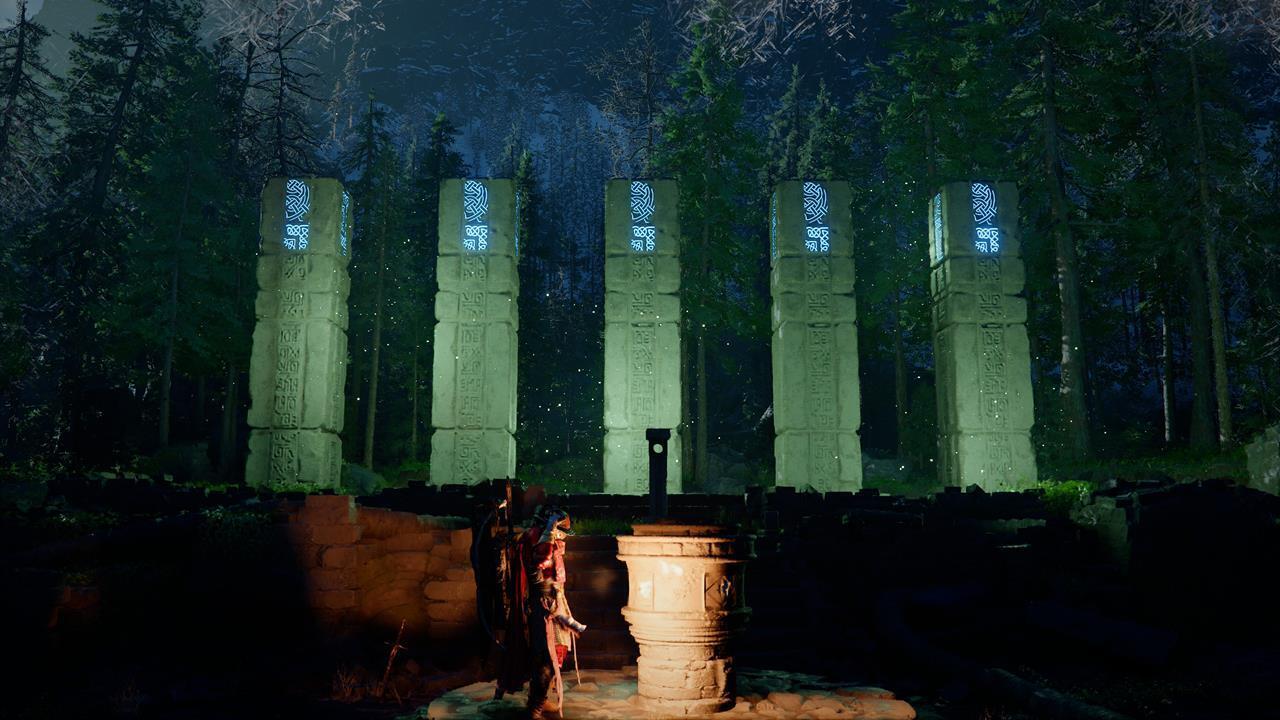
- HUNTER'S CABIN RUINS
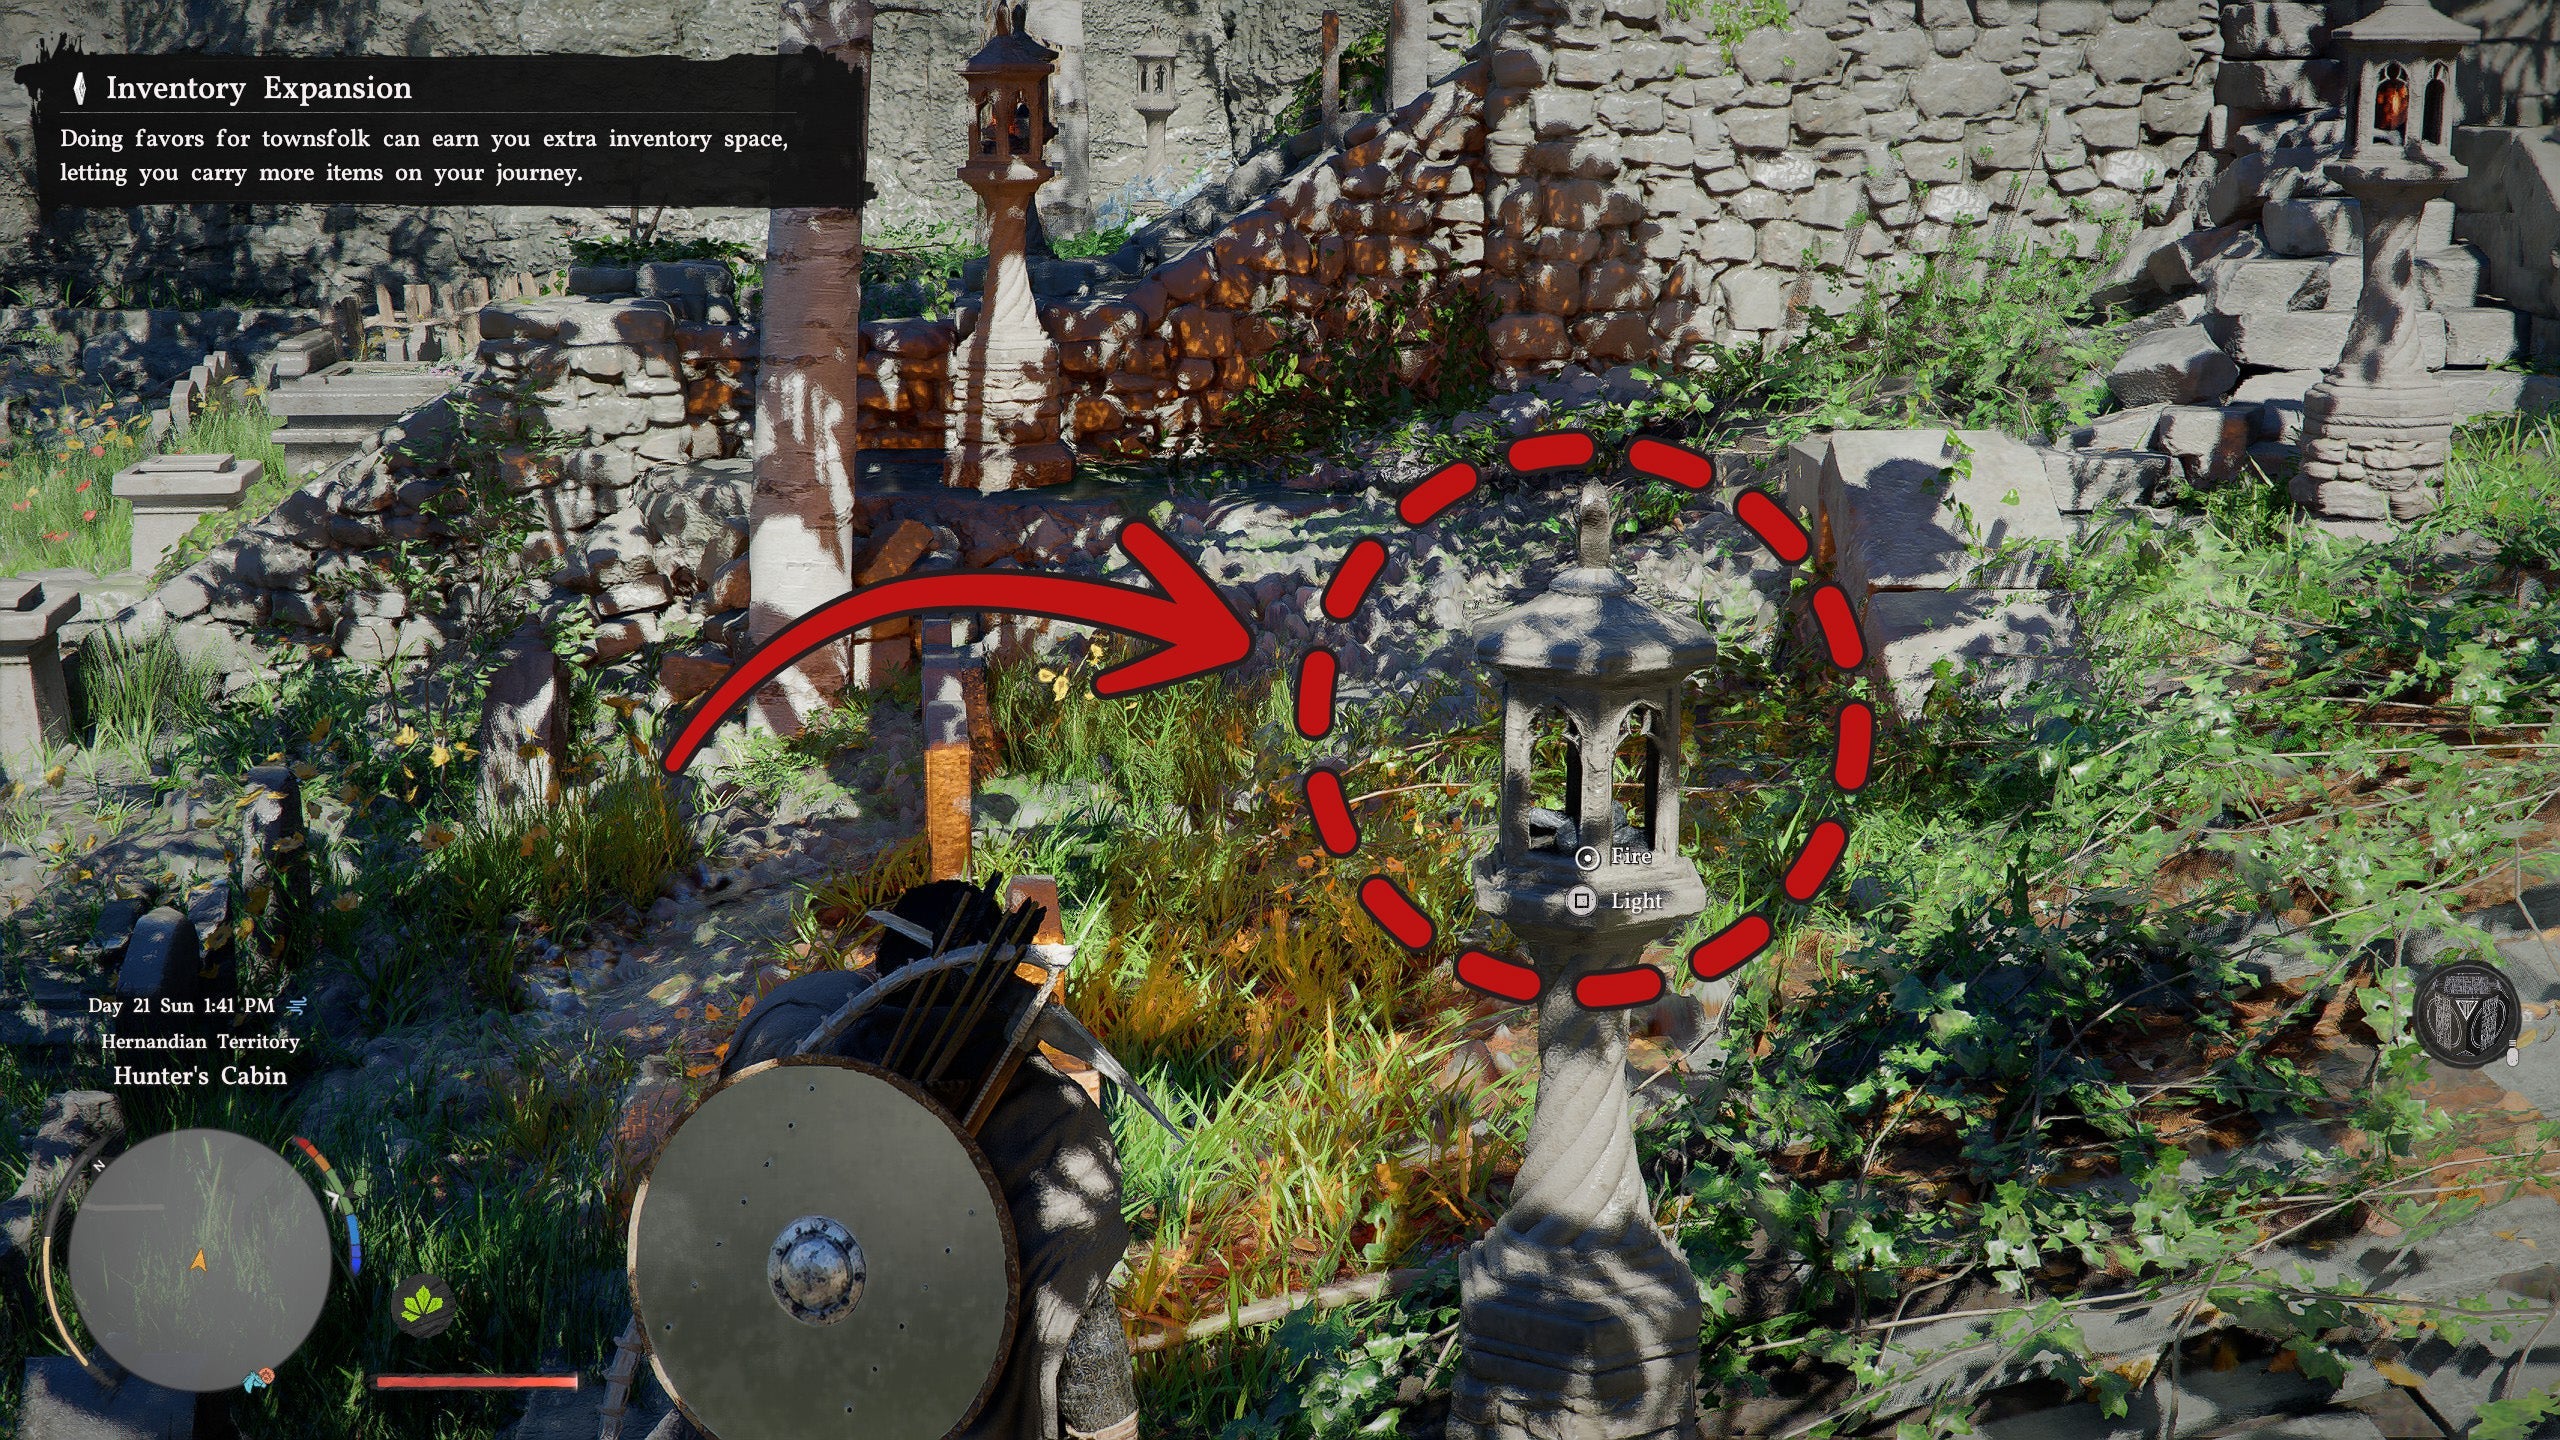
Type: Lantern Lighting
Location: At the Haunted Hill map marker, west of an Abyss Nexus fast travel point
Solution:
- Use Visione to find the Memory scene
- Light all 5 lanterns
- HAUNTED HILL RUINS
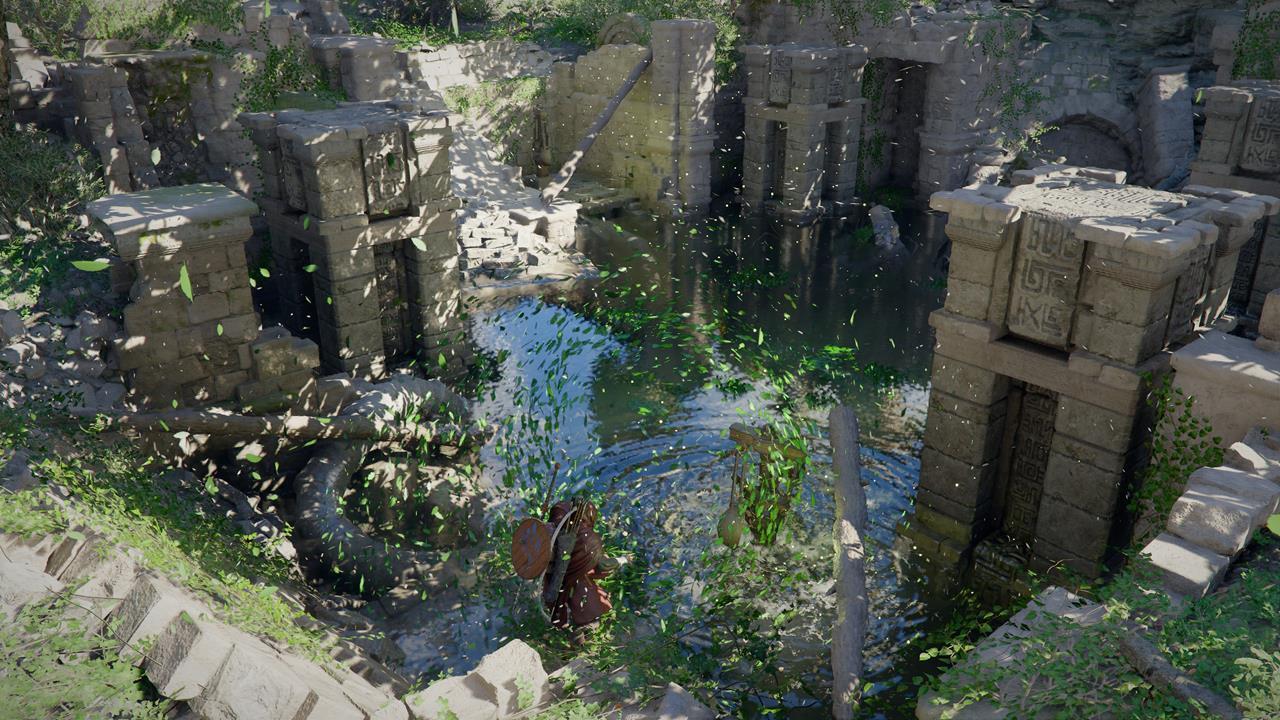
Type: Water Drain
Location: Due east of the Abyss Nexus fast travel point
Solution:
- Unlock the Nature's Snare skill (Spirit/green branch)
- Cast Nature's Snare on the first mechanism on the side — keep rotating the right thumbstick until water level drops
- Once water drops, a second mechanism is exposed — cast Nature's Snare on it
- Water fully drained, puzzle complete
SOUTHERN HERNAND (4 RUINS)
- AZURE MOON LABYRINTH RUINS
Type: Mural Puzzle (Complex)
Location: Hidden chamber deep below the Witchwoods where you meet Elowen the Witch
Solution: Complex mural puzzle. ➡️ [Full guide: Azure Moon Labyrinth Puzzle Solution](/guides/azure-moon-labyrinth-puzzle)
- PRECIPICE OF ECHOES RUINS
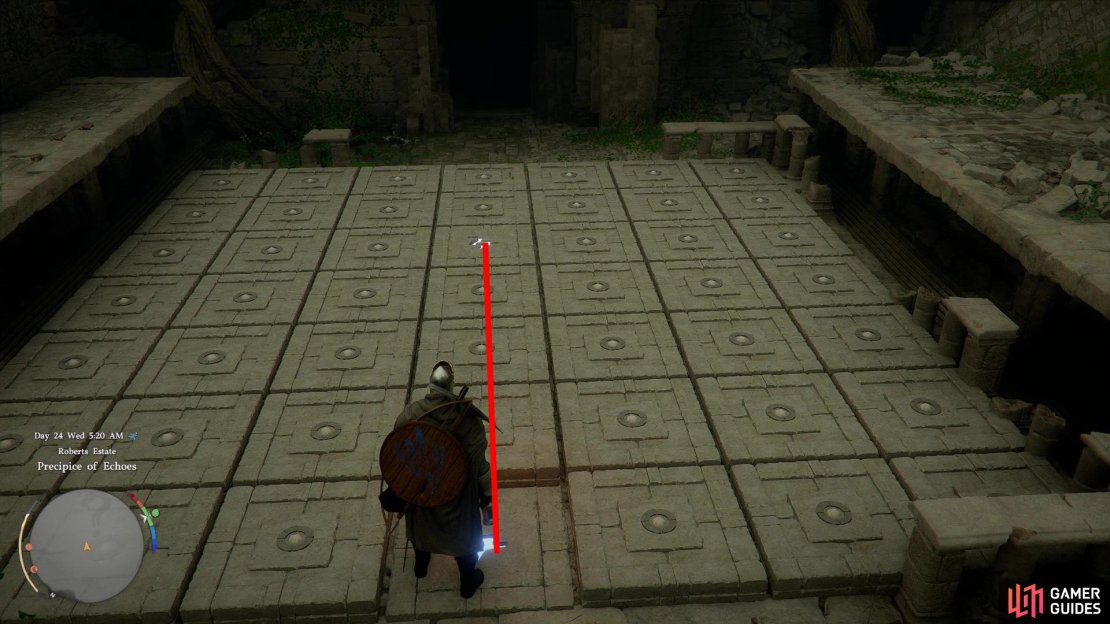
Type: Stepping Stone Symbol Matching
Location: Directly south of Fort Perwin
Step on a symbol tile, walk to its matching symbol. Cannot reuse grey tiles or step on wrong symbols. Three rounds (1 pair, 3 pairs, 5 pairs).
Key tip: Hold lantern (CTRL/LB) to slow-walk and avoid frame-rate missteps. ➡️ [Full guide: Precipice of Echoes Ancient Ruins Puzzle Solution](/guides/precipice-of-echoes-ruins-puzzle)
- SUNRISE PLAINS RUINS
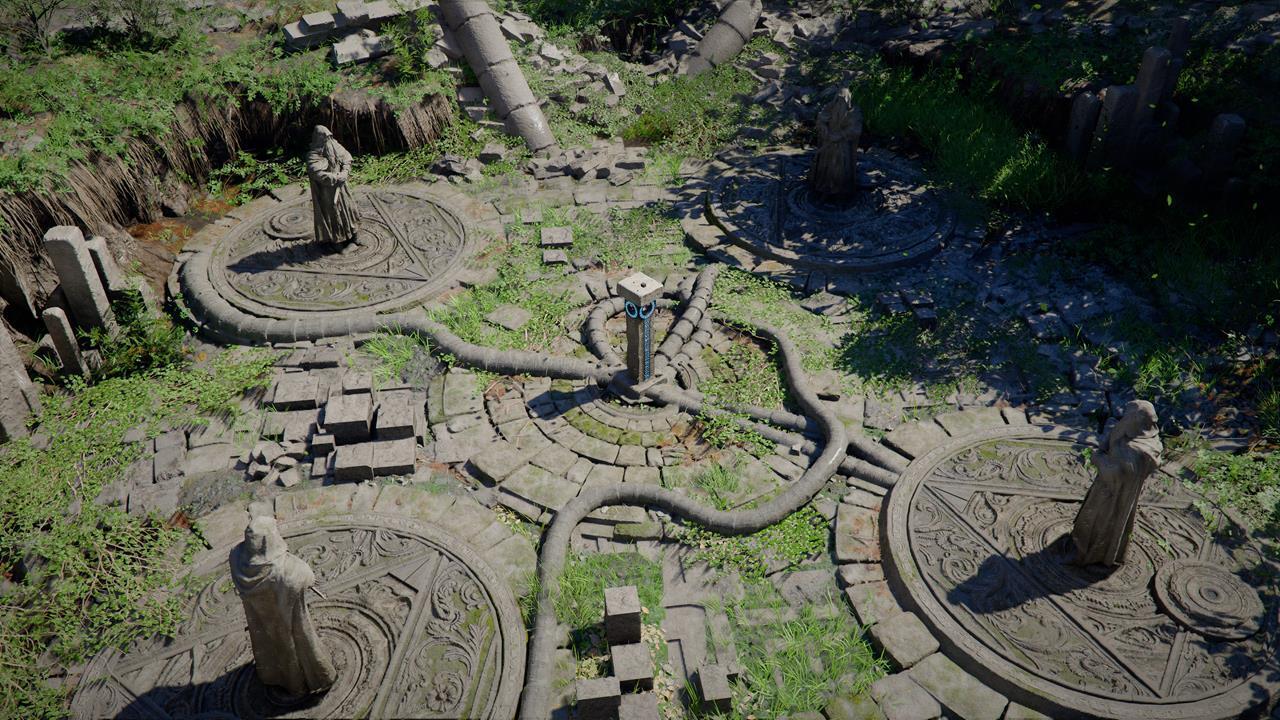
Type: Statue Rotation
Location: Due south of Glenbright Manor and Emberwind Workshop
Solution:
Rotate all statues to face the center pedestal. Notes:
- Rotating one statue may move others as well
- Requires trial and error
- Listen for the stone "thunk" sound to confirm correct alignment
- STEEL MOUNTAINS RUINS
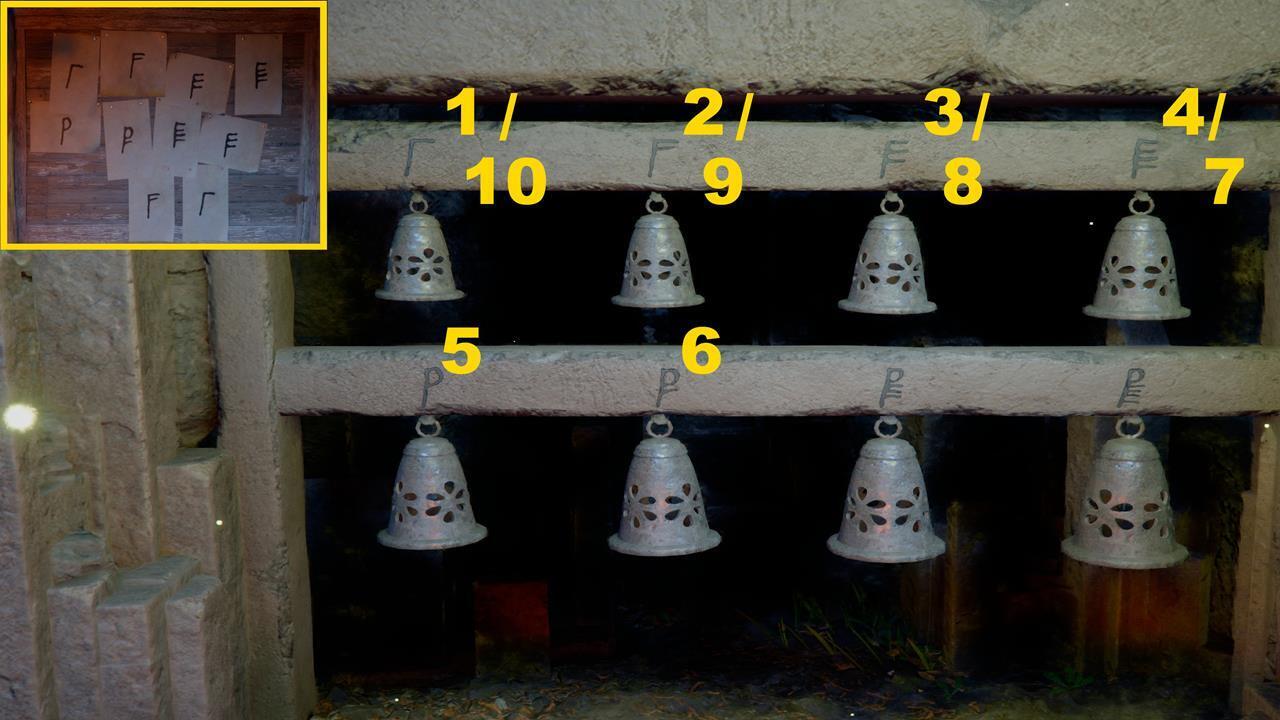
Type: Bell Sequence
Location: Far south in the Steel Mountains, near Spire of Insight
Solution:
- Pick up the Mallet on the ground and equip it
- Read the symbols on the board, then strike the bells:
- Bells 1 through 6 (ascending, left to right)
- Then bells 4 through 1 (descending back)
NORTHERN HERNAND (5 RUINS)
- DEEPFOG BASIN EVERFROST RUINS
Type: Pillar Height Adjustment
Location: Mountain pass northwest of Calphade
Solution: Same mechanism as Duskwood Hill Ruins (#3). Use sockets to adjust pillars to match the reference height.
- DEEPFOG BASIN DRAGON HEAD RUINS
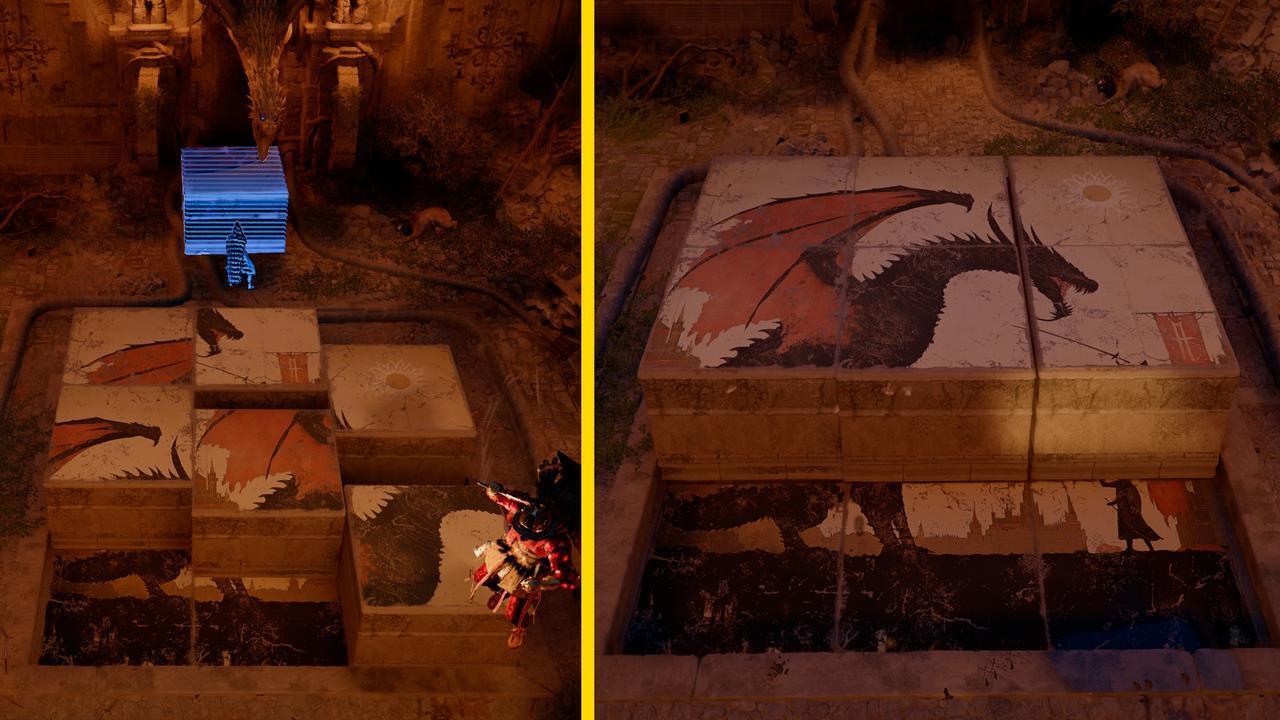
Type: Sliding Block Puzzle
Location: Mountain pass west of Calphade (south of Everfrost Ruins)
Solution: Rearrange blocks to form a complete picture. Use Stab to drag blocks in any direction.
- ARBORIA FOREST RUINS
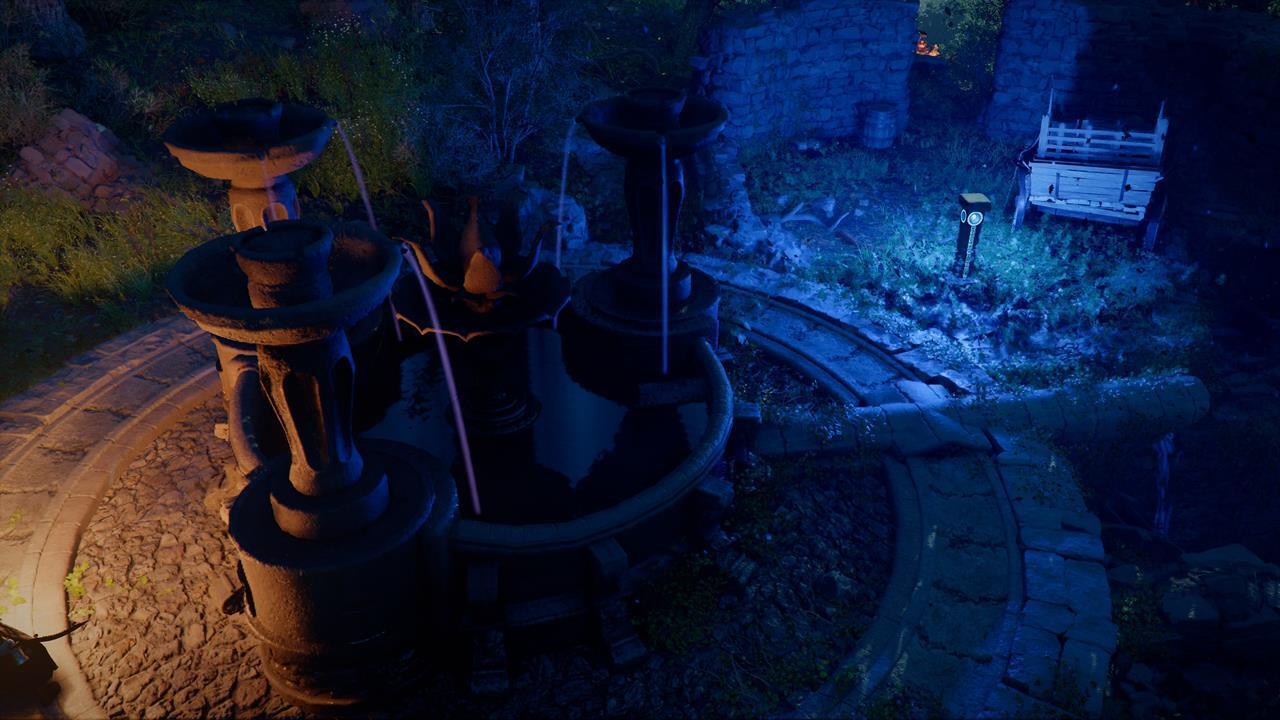
Type: Fountain Rotation
Location: Due west of Hills of No Return
Solution:
- Use Stab on the mechanism sockets
- Move sideways to rotate the fountains
- Adjust until both waterspouts fill the central basin
- Pool fills up, puzzle complete
- DRAKESFALL GORGE RUINS
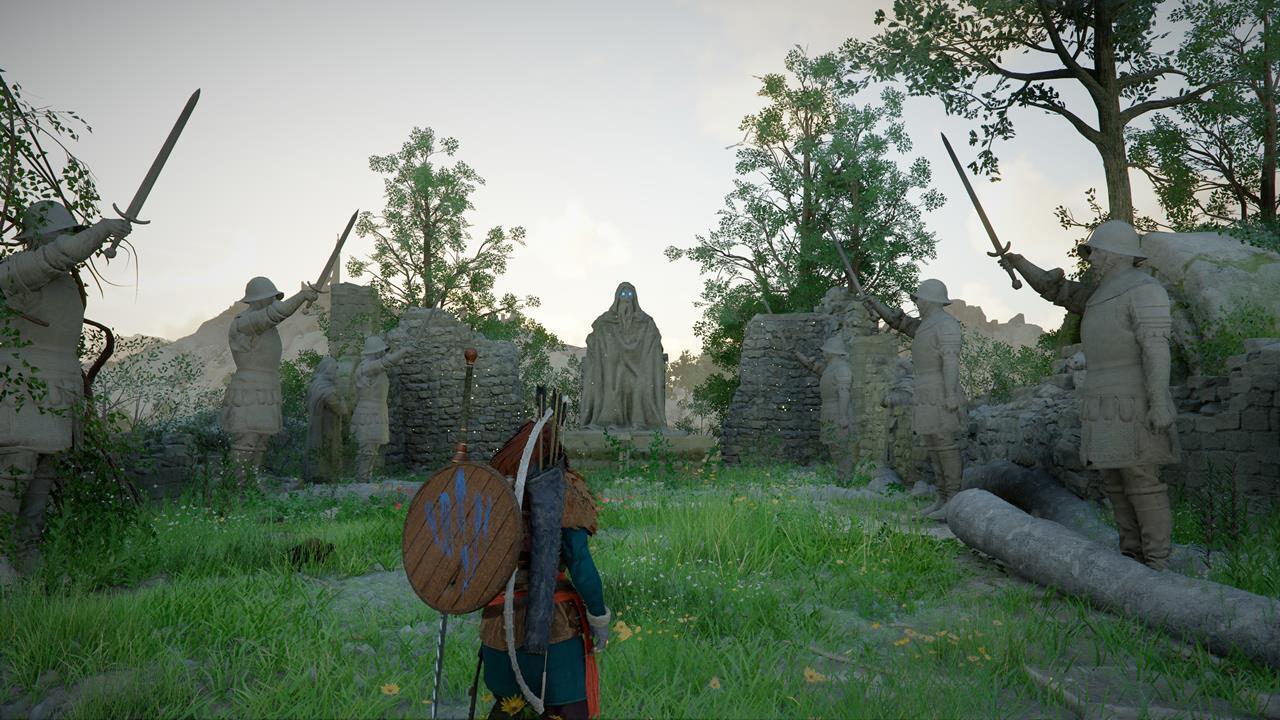
Type: Red Light, Green Light
Location: Plateau in Drakesfall Gorge near Hernand soldier camp, on the Demeniss border
Solution:
- Step on the stone plate to start
- Soldier statues raise swords, king statue at the far end
- Walk toward the king statue
- When the king statue turns around with glowing eyes — freeze immediately
- Getting caught (eyes turn red) = restart
- Reach the king statue to complete
You must be completely still. Even the slightest movement will be detected.
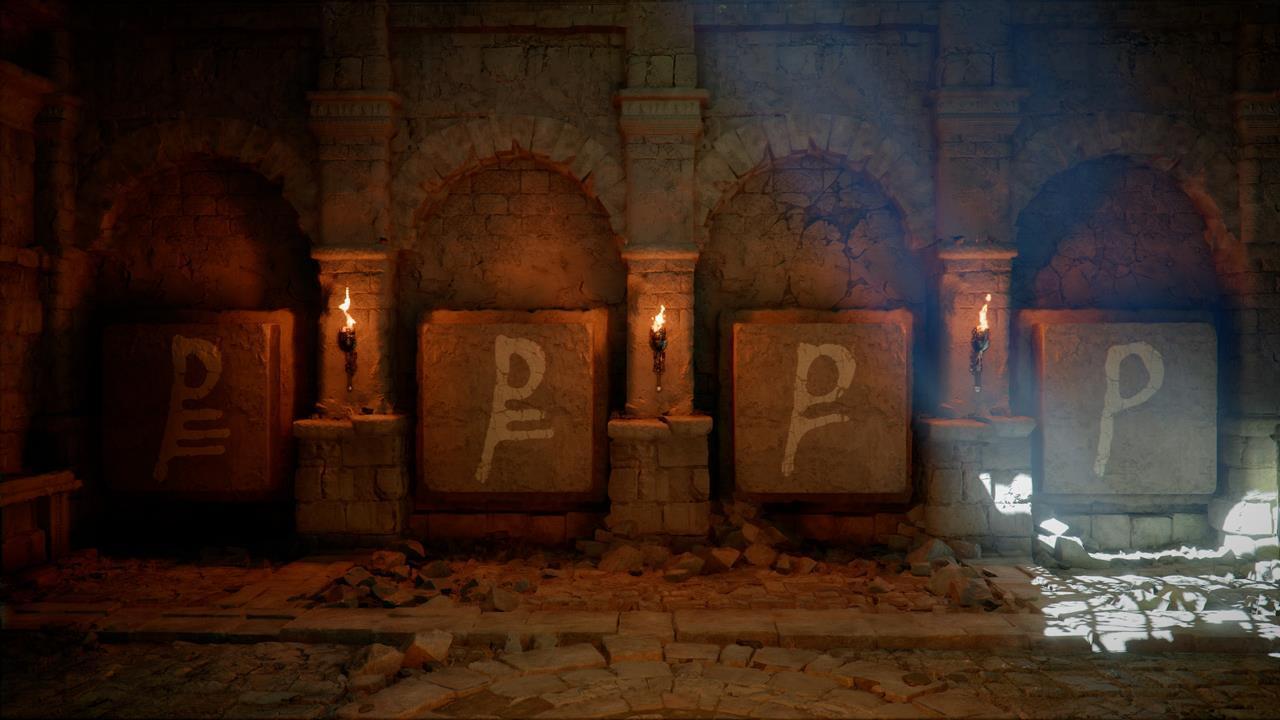
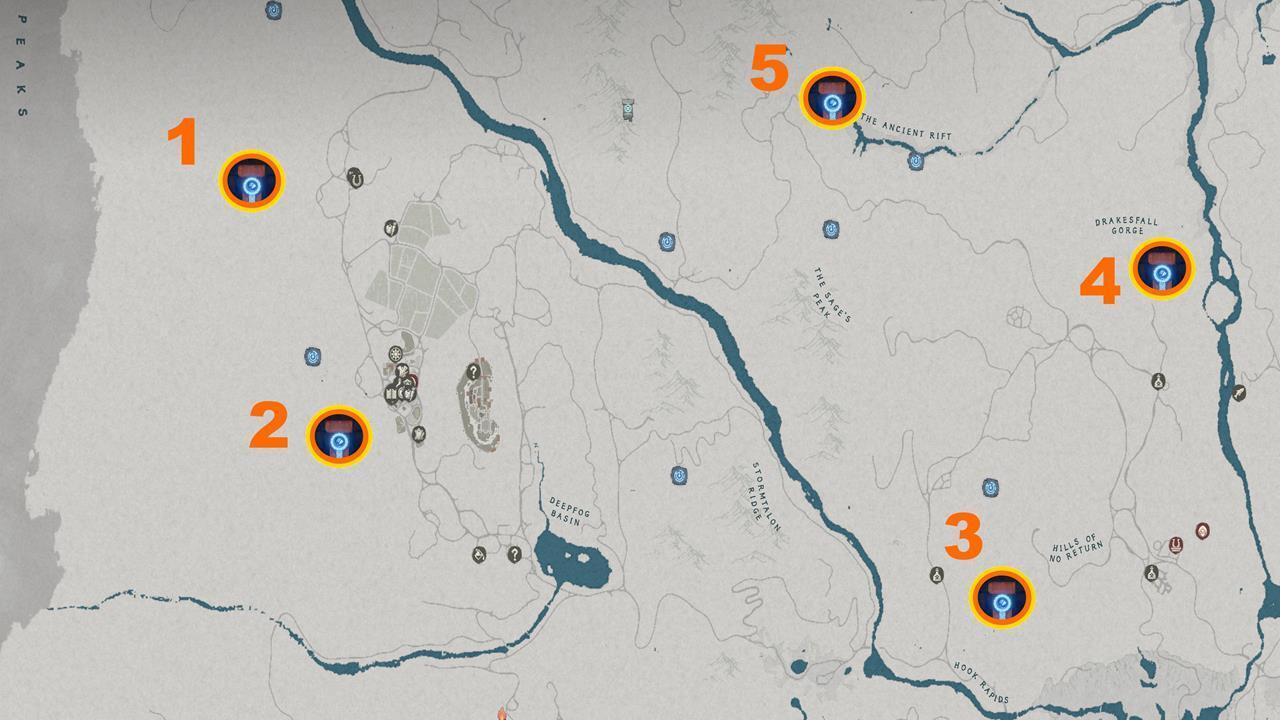
- ANCIENT RIFT MAZE
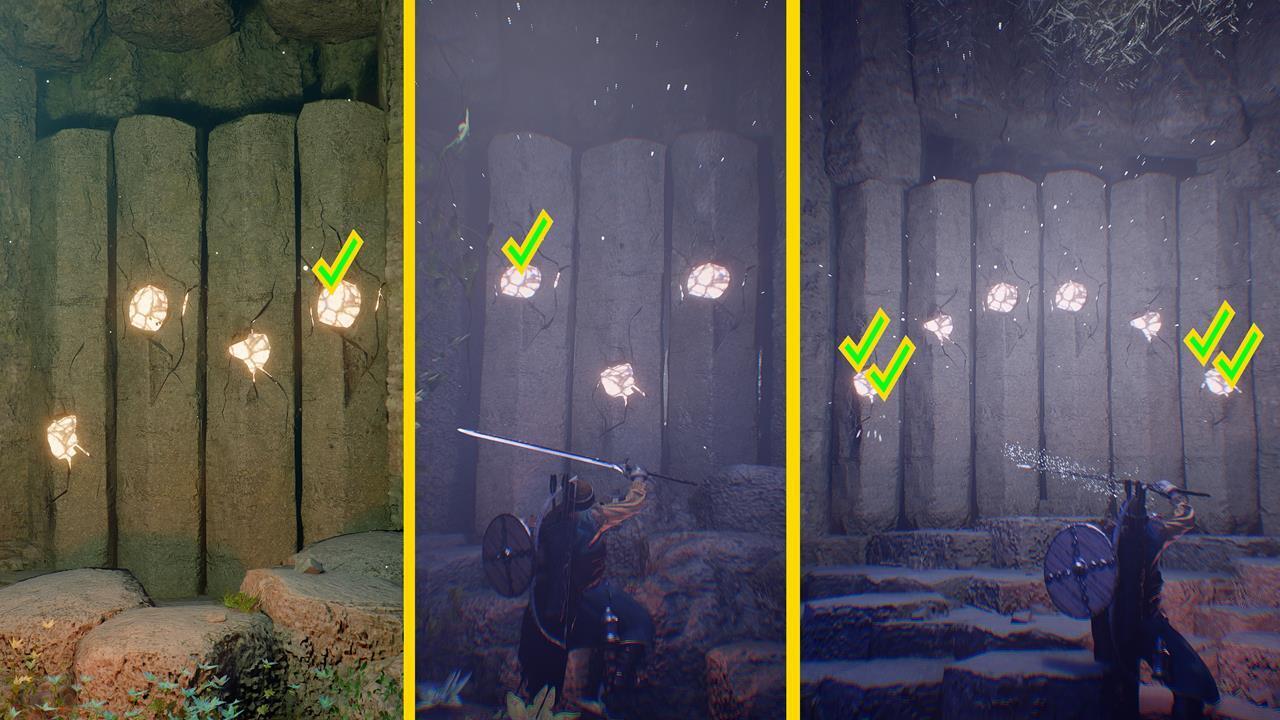
Type: Runestone + Engraved Stone Collection
Location: Northern edge of Hernand, north of Sage's Peak, south of the "P" in Pailune
Solution (one of the most complex ruins):
Find 3 runestone sets and use Blinding Flash - Concentrated Light on the correct runes:
| Runestone | Location | Action |
|---|---|---|
| #1 | Between "The" and "Ancient" on map | Concentrated Light on 4th (rightmost) rune |
| #2 | Opposite side of gap from #1, below left | Concentrated Light on 1st (leftmost) rune |
| #3 | Slightly elevated, right of #2 | Concentrated Light x2 on 6th rune, then x2 on 1st rune |
After each set, enter the nook and use Force Palm on the block to get an Engraved Stone. Collect all 3, then place them in the sockets on the other side of the maze to activate the Abyss Cresset.
Bonus: Nearby waterfall hides Ancient's Heart Cave (use Stab to enter). Contains Vaporwalker unique boots and a Refined Palmar Pill.
RECOMMENDED ORDER
| Priority | Ruins | Reason |
|---|---|---|
| 1st | #1 Meandering Hills | Main quest path, simplest |
| 2nd | #4 Dragon's Stone Chamber | Completing it reveals all hidden caves on the map |
| 3rd | #2 Duskwood Waterside | Simplest puzzle, grab it in passing |
| 4th | #5 Halssius Conflux | Learn Angel Statue mechanics (appears in later regions) |
| 5th | Other Central | Close to camp, do anytime |
| 6th | Southern | Requires traveling farther |
| 7th | Northern | Farthest away, #16 is most complex |